The abbreviated 2019-2020 ski season left a whole bunch of previously happy inbounds skiers with no alternative but to pick up some form of backcountry skiing. That looked different for everyone, some folks went all in, bought themselves a full setup, and started skinning up mountains. Others just strapped their park skis to their backs and started hiking. Regardless of how committed to human-powered skiing you are, if you’re traveling in avalanche terrain that’s not being controlled for the public by avalanche professionals, you are now a backcountry skier. So welcome! Human-powered skiing is awesome! But it’s also challenging, dangerous, and often frustrating. So here are some resources and tips and tricks I’ve put together to help ease that transition, from selecting new gear, to resources for staying safe and sharp. As always, this guide isn’t exhaustive, so let me know what I’ve missed in the comments.
Gear
Last year I put together this guide to what kind of touring gear a typical Newschool skier should be looking for. I’ve thrown in a few tweaks and updates over the summer, and I still stand by all of my recommendations in that piece. So I won’t go too in-depth on gear here, other than to make a few observations.
COVID has increased demand for backcountry gear, many shops sold out of skins in the first 48 hours after ski resorts closed. (Stay tuned for an awesome piece from Sklar on the pandemic’s wide-ranging impact on the industry.) And that demand has stayed strong, more folks than ever are preparing to spend time in the backcountry this winter. So if you’re on the fence about buying a piece of gear, you should probably do so sooner rather than later. Gear is going to sell out, especially as resorts announce ticket limits, reservation systems, and other barriers to just skiing inbounds whenever you want. Buy now or prepare for gear to be out of stock later.
Because of that increased demand, lots of folks are trying to sell old touring gear for more than it’s really worth. Do your research well and be careful with older gear. Used Dynafit Beasts are never worth more than $150. You will break them, and replacement parts will probably not be available. Be wary of overpriced, overused touring setups.
Getting Educated
The traditional path to avalanche education usually starts with an Avy 1 course. But COVID has changed classroom dynamics, and every educator will be handling this differently. There is more demand than ever for these classes and more hurdles to offering them. So register early. If you can’t get into an Avy 1 this winter, consider getting a group of friends together and paying for a private Avy 1. They’ll usually be about the same price (or maybe a little more expensive) and you’ll get a lot more out of the class if you’re taking it with a group of similarly skilled people who have similar goals in the backcountry. Contact local Avy pros and see if they’re interested in teaching and what size group you would need. Locally I have a few friends both offering and taking private Avy classes this year, and it’s valuable and convenient both for the teachers and students. If you took your Avy 1 five years ago and then haven’t been using it, take a refresher!

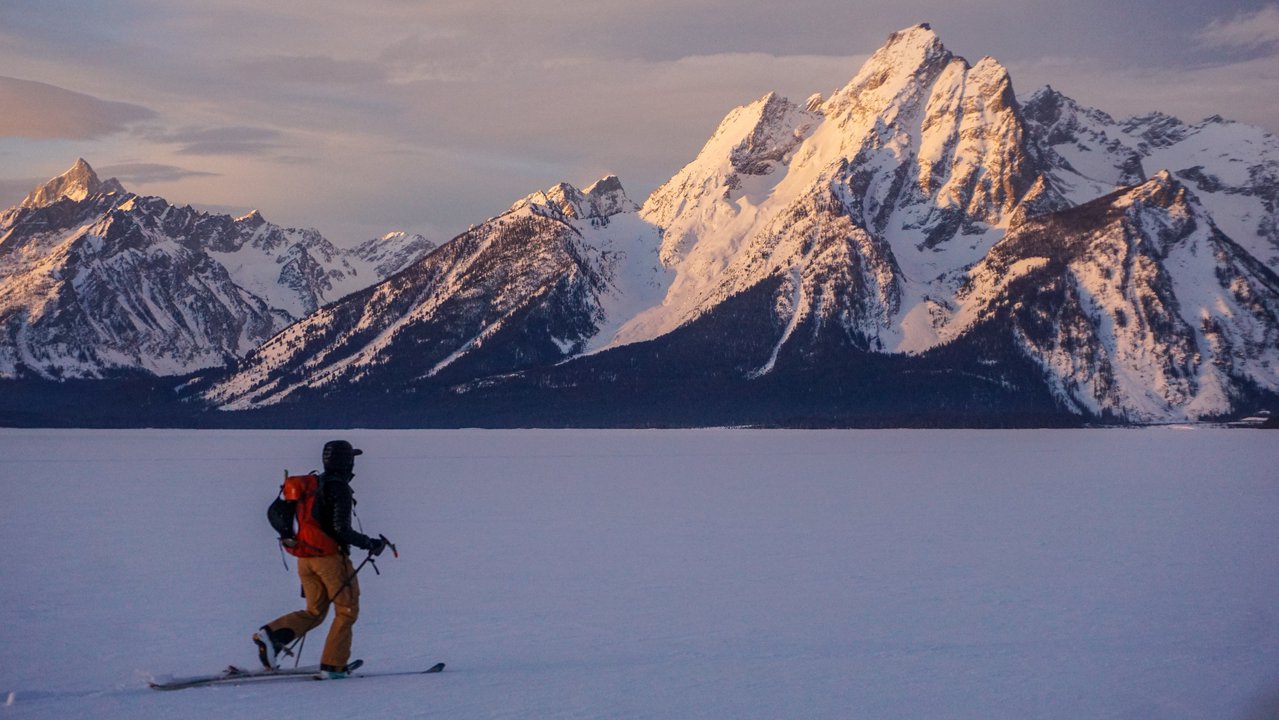
This is how skiing with ropes makes me feel.
Beyond formal education, here are a few recommendations on ways to become more informed before the season starts:
Read Staying Alive in Avalanche Terrain. This is the bible for good reason. Get your own copy, read it, take notes, fold down pages, try to get as much out of it as possible. Just learning and understanding terms will help you read forecasts and ask better questions to inform your decisions.
Read The Avalanche Review. It’s a large format, beautiful, affordable magazine. And sometimes I draw stuff in it. It's full of the smartest thoughts from the smartest people in the industry. Invaluable.
Look through the Event Map for the past few years.
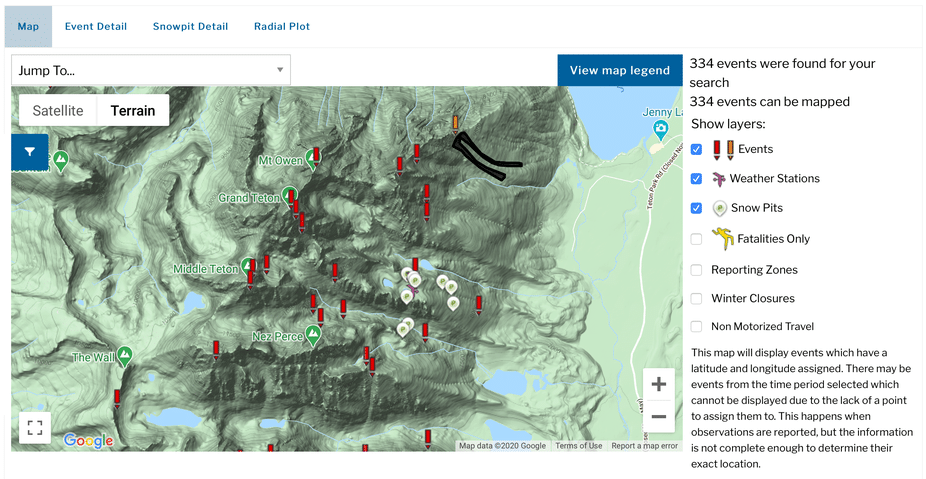
Look up the avalanche center for the area that you plan to ski in. If you don’t have the wherewithal to do that simple google, you probably don’t belong in the backcountry. Once you’ve found that site, bookmark it. You’re going to use it a lot this winter. Find their “Event Map” this is just a map overlay with every avalanche incident that’s been reported over whatever timeframe you select. So basically it’s a shorthand way of looking at what’s been known to slide in your area. Look through each incident and try to figure out how the factors of weather, terrain, and human traffic combined to make snow move. Having a decent idea of what’s prone to slide is vital to making good decisions.
I’d also recommend pulling up Gaia (pay the fee, use the app, it’s so worth it) and comparing it to the event map. I’m a big fan of actually adding a pin to Gaia with every avalanche incident of the past three years. Include a short sentence of what storm cycle came right before, and what triggered the slide. Then, whenever you’re in the backcountry, you can just pull up Gaia and have a bunch of automatic warnings that pop up. Many things slide routinely a few times a year, having a red pin and some information whenever you’re near them really helps inform decisions. The only thing we truly have control over in the mountains is what terrain we choose to travel in. Make better choices.
On that note, play around with Gaia’s slope angle feature. The event map will have slope angles, aspects, and elevations for every slide. Compare those on Gaia. Look at what color slope angles slide a lot. Look at what sort of terrain features the contour lines describe. Look for patterns and similarities.
Sure, this sounds like homework, but it’s October and you’re already desperate to ski. Skip watching Refresh for the third time this week, and get informed instead.
Road Protocol
While your avalanche education will give you a lot of tools for traveling in the mountains, what about actually getting to the mountains? Generally, the parking lots we use to access backcountry skiing are small, often closed, and have unwritten protocols. So, as a new backcountry skier, it’s really important to pay attention and learn the rules. Every area will be different, but there are a few things to look for anywhere you go.
Respect parking lot closures. If the parking lot is closed, it’s for a good reason. It’s usually either because Avy control work is being done, and they need to make sure that there’s no one in the line of fire, or because plows or other machinery need the lot. Either way, the road and lot staying open for normal traffic is more important than you getting to go skiing. Respect closures. Your state transportation website will usually have more info, and most places have a community Facebook page that is also useful.

Don’t park like a jackass. This should go without saying, but it doesn’t. Use parking lots as efficiently as possible. Carpool whenever you can. Park close to the people next to you. Don’t park in wonky diagonal ways that make it hard for others to fill in the lot. People get angry in parking lots. Don’t be a source of that anger.
When you’re skiing, be hyper-aware of what’s underneath you. Personally, I will never ski something above an open road if the Avy danger is “Considerable” or higher. It’s a consent thing. If I’m out backcountry skiing with my partners on a higher danger day, we’re all aware of the risks and working together to minimize them and stay safe. Folks just driving to work don’t deserve to be put in that kind of danger. And even if a slide you put over the road doesn’t endanger someone, it screws up travel for a whole bunch of folks and threatens backcountry access for all skiers.
Lots of backcountry zones have some sort of hitchhiking or shuttle attached. Follow good shuttle protocols. If you’re shuttling a group, choose one person (folks with cute braids poking out of their goggles get picked up faster) to hitchhike. Have them stand in a natural pullout area where anyone picking them up has room to get all the way out of the road to load. Don’t make them hitch with their ski gear. The goal is to make this as easy for the driver as possible. Don’t try to hitch all six of your group at once. Have one person hitch up and grab the car and pick you up. Nobody wants to delay their commute to try to pack six potentially diseased, skiers into their car, with their gear. Send one person, make it easy for the driver.
Finally, if you’re just getting started and learning the ropes, don’t bring your dog. It takes experience to figure out what backcountry laps are suitable for your dog. If you don’t know, don’t take Fido.
Conclusion (For now)
So there you have it, part one of my tips and tricks for newcomers to backcountry skiing. Next week we’ll cover some techniques to help grow and acquire experience, ideas for how to stay current throughout the winter, and recommendations for existing backcountry skiers on how to deal with the influx of new backcountry users. Stay tuned, and I’ll link from this article as soon as Part Two is published.
Comments