“Backcountry” might just be the biggest ski industry buzzword of the last few years. But most of the coverage of that kind of gear is written from the perspective of directional, traditional skiers.
We’re Newschoolers, we ski park, and when we ski the rest of the mountain we’re jumping off of things, throwing spins and flips, and skiing backward. So here’s an intro to backcountry ski gear for jibbers, with some rough guidelines to help you shop for touring gear. A lot of this is covered in various threads in the AT and Backcountry forum, so I’m just consolidating all this info in one piece for easier reference.
I’ll be doing a few more articles with specific tricks and technique tips that I’ve learned over the years in the next few weeks. For now, here’s an overload of information to set the stage and get you started down the dark, dark path that is earning your turns. Feel free to argue with me in the comments, I’m always down for an internet tussle.
_
Resources:
Having accurate weights and other specs for gear helps narrow down the field and make difficult choices easier. Newschoolers' Roofbox Reviews and Blister Review are great sources for actual measured weights and dimensions (as well as really, really good ski reviews).
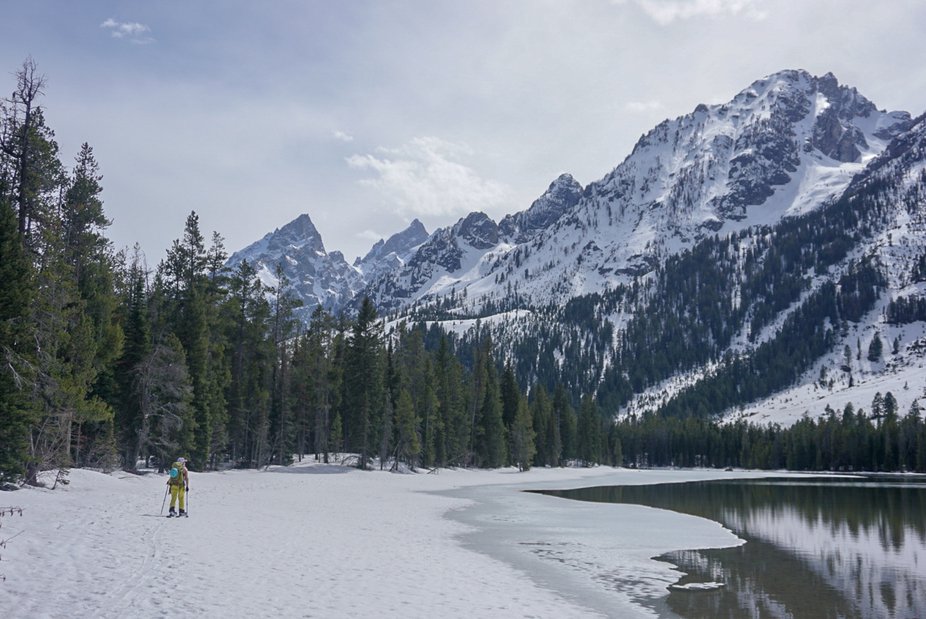
This article will be peppered with random backcountry shots of my friends and myself to keep your attention. Nobody hit any jumps this day, but I did ski switch a little. And the views were nice.
_
Weight
Most inbounds freestyle skiers aren’t obsessed with weight, and for folks getting started down the backcountry path, it’s really not that important. But it’s worth knowing how much your stuff weighs, so that in the future if you’re looking to get a lighter setup, you can tell how much of an improvement you’re making.
Generally, I’ll be talking about ski weight in terms of one ski from the pair, in a 183-188ish cm length. And I’ll be using grams because they break down the spectrum of ski weights in a cleaner and more precise way than ounces and pounds.
That means that if you have shorter skis, yours will weigh a bit less than the examples I’m talking about. But, even if you’re skiing 169 cm skis, you can look at the weight of the 184 cm version on Blister, and make comparisons to other 184ish cm skis. Those general comparisons will usually translate to shorter and longer models as well.
_
Safety and Education
Backcountry skiing is dangerous. You’re not just putting yourself at risk when you head into the backcountry, you’re also making decisions that affect any other skiers out in the hills, anyone else in your group, and any search and rescue personnel that may have to put themselves in harm’s way to help you out.
Get educated, take an avy class and stay up to date. Practice with your beacon, shovel, and probe regularly. Read the avy bulletin for your ski area every day. Make conservative decisions. Be smart, stay alive.
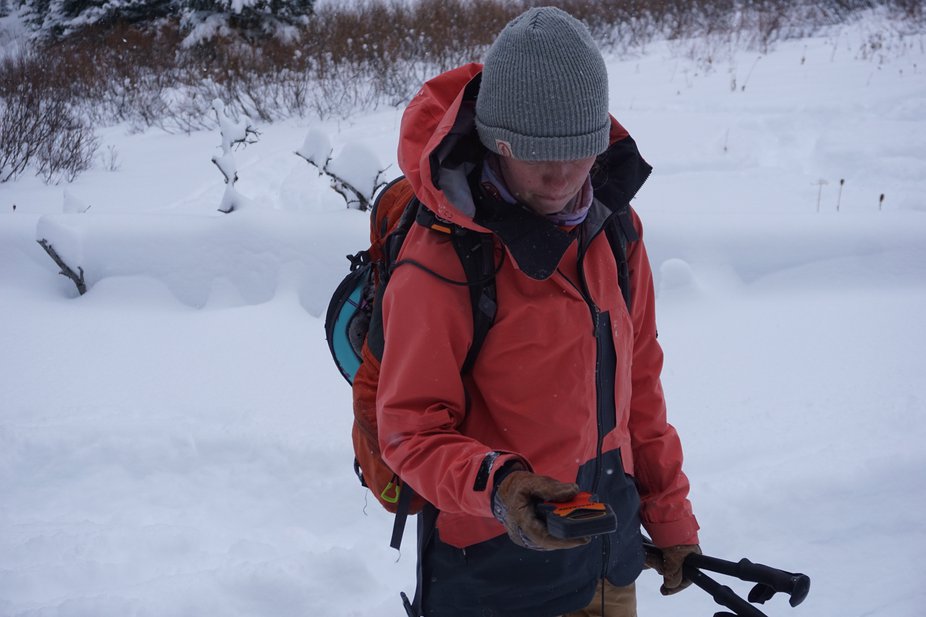
Beacon, or Bacon Search?
_
Snow Safety Gear
This is just a quick overview of snow safety equipment, I’m leaving plenty out, and there’s more to be said, I’m just covering it here to help you in future research. There’s plenty of good writing on the internet about safety gear, and it applies to everyone, not just Newschoolers.
Your Mind
Use your head. The only way to stay completely safe from the risk of avalanches is to stay out of the backcountry. A clear head makes good decisions. Don’t let powder frenzy push your risk tolerance. Learn good decision making from more experienced backcountry skiers. There’s a bunch of good articles about this out there. Read them.
If you ski in the US, download this free app. It pulls your precise GPS coordinates and formats them in a text for help if shit does hit the fan. It works in any county that has text to 911 enabled, and there’s no reason not to have it. Having your precise location drastically cuts the time it takes rescuers to reach you, and texts can often get through spotty service that calls can’t.
Beacon
Any time you head into the backcountry you need to be wearing an avalanche transceiver and know how to use it. There are a ton of options on the market. Make sure you’ve got a three-antenna beacon, most new ones are. BCA’s beacons are very beginner-friendly and are often easy to get a deal on. The Tracker 2, Tracker 3, and Tracker S are all fine beacons.
Personally, I really don’t get along well with BCA’s transceivers though. I’m a huge fan of the Mammut Barryvox series and BD’s new beacons. My Barryvox S consistently picks up a signal 20 m further out than my partner’s Tracker 3, and the multiple burial flagging is much easier to use. But that’s just anecdotal evidence. It doesn’t matter how fancy your beacon is if you don’t know how to use it quickly and accurately.
Shovel
Get the biggest one that can fit in your pack. If you have a little pack, get a bigger one, and put a bigger shovel in it. A “D” handle and/or a hoe mode makes it easier to move a bunch of snow fast. Bigger shovels make it easier to build booters and to dig out friends. Win-win. Don’t get a collapsible shovel from your hardware store. I’ve seen a couple of those break catastrophically.
Probe
Get a longer one than you think you need. They all pack down small and don’t take up much room in your pack.
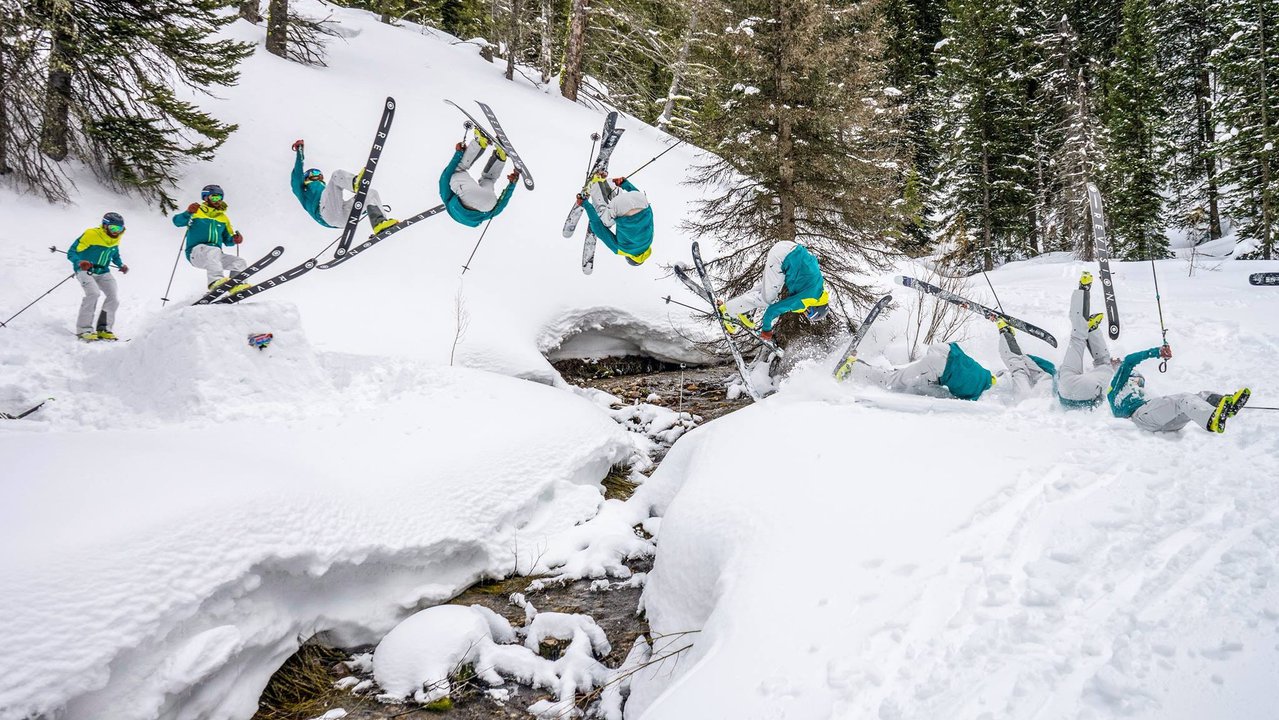
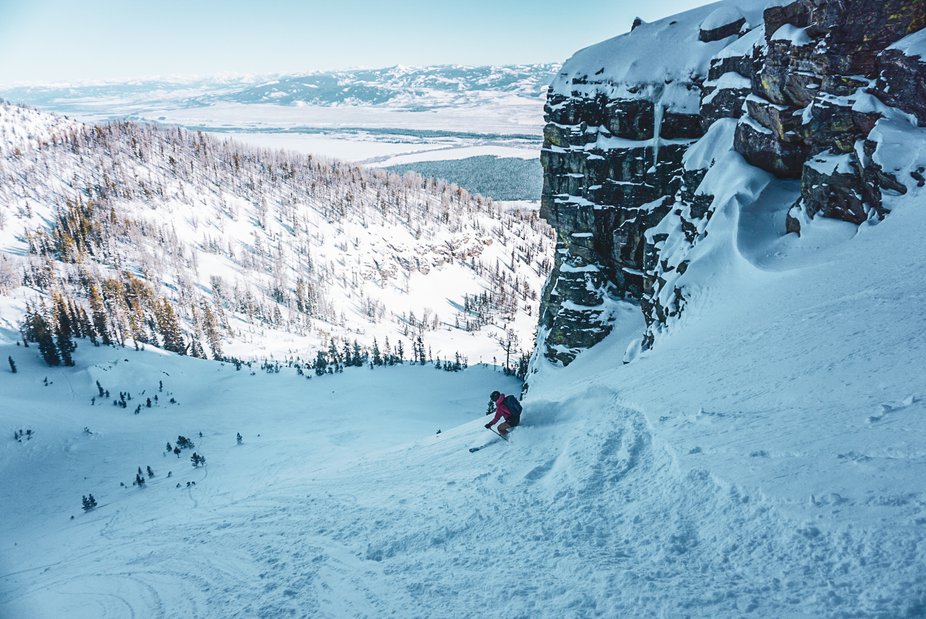
Landings are softer in the backcountry, but my form isn't any better.
_
Skis
Now for the fun stuff! If you’re looking to earn your turns, it’s really tempting to shop for a light ski with “tour” in the name. And that’s fine, but Gear Talk is full of folks who bought some ultralight touring ski and realized they hate it because it’s just a dad ski with even less backbone.
In my experience, especially for folks getting into backcountry skiing, don’t think about weight when it comes to your first touring ski. Do you have a favorite one-ski quiver inbounds? Throw some touring bindings on it and haul it uphill. You’ll tire out a little faster, but it’s 100% worth it to have something familiar and dependable on your feet when you’re dealing with variable snow in big terrain far from the car.
Don’t freak out that your ski is too wide, or too heavy. If you’re just trying to build your first backcountry setup, just put touring bindings on your favorite pair of skis. You can always upgrade easily in the future.
When you do get to that point that you want a dedicated lightweight touring setup, and want to climb longer days in the mountains, the market has finally come up with some awesome options that are designed for folks that like to spin and ski backwards. Here are some general weight guidelines:
1200-1400 grams per ski: Skis this light are generally fine for running up mountains, but they really suck coming back down if the snow is inconsistent at all. If you’re still at the touring stage where you’re looking for general advice from some guy on the internet, don’t bother unless you like jogging around in spandex.
1500-1700 grams per ski: In my experience, this is the sweet spot for touring skis that you won’t be using inbounds at all. It’s light enough for the biggest days, but you generally get a ski that’s stable enough for most backcountry conditions. You won’t be able to charge variable snow, but you can ski it without hating yourself.
1800-2100 grams per ski: This is prime 50/50 territory. Want a pow ski that you can ski inbounds any day, but is also light enough to tour on? There are a bunch of good options in this weight range.
2200 plus grams per ski: Fine as a first touring ski, pretty heavy otherwise.

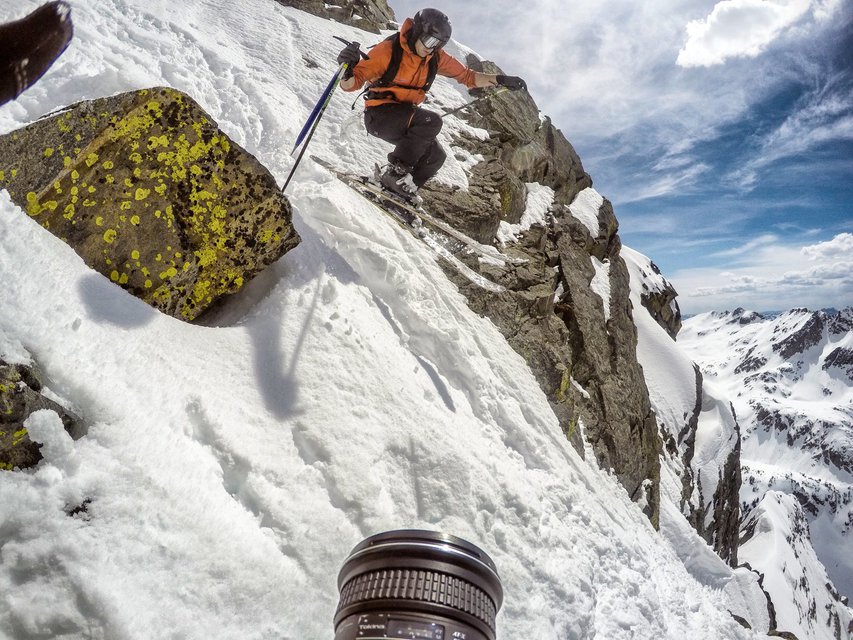
Wee!
_
Inserts
Most folks getting into backcountry touring are doing so on a budget. If you can’t afford new skis to dedicate to touring, consider drilling your current skis with inserts from Quiver Killer or Binding Freedom. This allows you to swap between two different pairs of bindings on the same pair of skis, so you can have lightweight pins for backcountry days, and your favorite inbounds binding for the rest of the time.
_
Boots
“Go see a bootfitter nerd!” But seriously, fit is even more important with backcountry boots. Don’t buy the newest and lightest if it doesn’t fit. Specifically, you’re looking for a little roomier, comfortable fit, with a little more space to help insulate the foot, even if it swells during a long day. To start out, look for a boot that fits, and that has some kind of walk mode and tech fittings. If you’re thinking about getting new boots, and there’s even a tiny chance that you’ll get into touring in the next few years, make sure you get something with tech fittings.
For the NS crowd, starting out, a heavier, inbounds-style boot with tech fittings is a good call. You can save a bunch of money initially by just getting an inbounds boot that can tour, instead of one that’s made specifically for touring. It won’t be as fun to take on long walks, but that doesn’t matter as much starting out as having a boot that actually skis well on the down. Once you’ve got some longer tours under your belt, and are sure it’s something you’re really into, you can nerd out on lighter touring slippers.
Just Buy Full Tilts
This is NS, so a bunch of you probably already have Full Tilts, if you do, and they fit, here are my two touring/inbounds capable recommendations. To be very clear, I don’t think these are the two “best” touring/inbounds boots on the market, they’re just the two most obvious choices for the NS market.
Roxa R3 130 TI
This boot fits like a Full Tilt Classic shell. Get it with a wrap liner and it skis like a Full Tilt with an 8 or 10 tongue too. And it’s got swappable soles, a heat-moldable liner, and tech fittings. If you’re coming from a Full Tilt Classic, this should be on your radar, it’s a seamless transition (and just an all-round better boot in my opinion). This is as close to the ultimate NS touring boot as I can imagine.
Full Tilt Ascendant
Of course, Full Tilt makes their own touring boot, the Ascendant.
Pros: it fits just like the Full Tilt Descendant, if that’s your jam, this boot will make you happy.
Cons: it weighs way more than it needs to, especially compared to the Roxa, the cuff is a little low, and it doesn’t fit at all like a Full Tilt Classic.
Another Boot Option
CAST has been leading the charge for real, durable touring bindings for years, and as part of this, they can fit a tech toe fitting into just about any pair of inbounds boots. That means your boots with work with CAST, or Shift. It’s pretty affordable, but it will void your warranty, and there is a wait time as you mail your boots in.
This is really awesome for already light boots like Atomic’s Hawx Ultra.
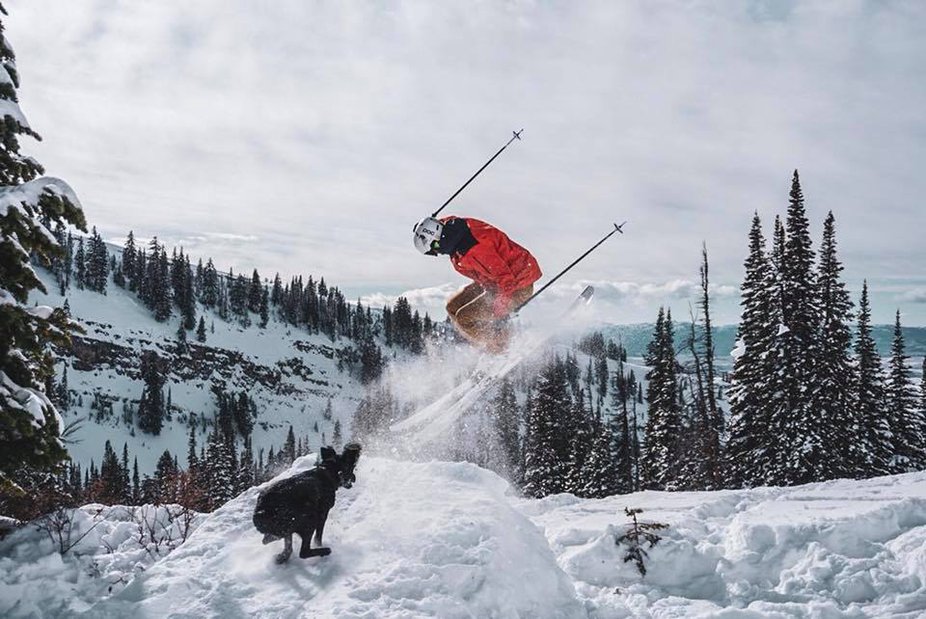
Dogs are not allowed in ski resorts unless you skin up. Another reason to get touring gear.
_
Bindings
This is where things get really complicated. There’s been a bunch of progress on this front in the last few years, and every brand thinks theirs is the best. Here’s my un-sponsored take on some of the main options. There are plenty of bindings I don’t cover here that are great touring bindings, but not great for the kind of walking uphill to jump off stuff that a lot of Newschoolers are doing.
Frame Bindings
Bindings like the Marker Duke or Salomon Guardian used to be the best way for skiers like us to walk uphill. They offer downhill performance and safety at a significant penalty of weight and inefficiency. The biggest pro is that they’ll work with your inbounds boots.
There are a few cons:
-They put a lot of holes in your skis, so it can be hard to mount them on used skis.
-They aren’t that durable.
-They really suck to do long tours with.
If you’re thinking about getting frame bindings, make sure you’re getting a really good deal (like $100 or less for the bindings) and that they aren’t too haggard. You can do big days on them (I did Mt. Adams on Full Tilts and Guardians), just don’t use a friend’s pin setup for a day, you’ll want to upgrade immediately.
CAST Freetour
CAST has been leading the way with jib-friendly bindings for years.
Pros:
-Pretty affordable if you already have Pivot 18’s
-Ski just like a Pivot 18 both in and out of bounds
-Tours way better than a frame binding
-Super durable, pretty safe
Cons:
-A little fiddly to transition
-Not light
-If you forget your downhill toes you’re screwed.
For most of the NS crowd CAST is the best touring binding I’ve found. It’s also the only option that I’m 100% comfortable recommending for people who want to ski hard inbounds everyday as well.
Salomon/Atomic/Armada Shift
Shift is Amer’s take on a binding that works well in or out of bounds, and it does a pretty good job. That said, it’s fiddly to set up, some folks have had pre-release issues, and if you’re planning on bashing your touring setup inbounds every day it’s not as durable as CAST.
Pros:
-Walks pretty well
-Skis like an inbounds binding
Cons:
-Lots of plastic
-Hard to adjust
-Only one climbing riser
-Only 13 DIN
You can also just go ski pow without jumping off stuff.
Marker Duke PT
This binding is new this year, and it’s basically Marker’s version of a CAST setup. It seems sorta cool, but there are no real-world reviews out yet, so only time will tell.
Marker Kingpin
This is sort of the OG of huck-friendly tech bindings, and it’s still a decent choice. It skis really well and tours well too. Just make sure yours aren’t affected by any of the recalls or warranties.
My biggest beef with the Kingpin is that it skis basically as well as an inbounds binding, but isn’t as safe or durable. So uninformed folks charge too hard on them inbounds and either break their bodies or the bindings. It doesn't have the release characteristics of an inbounds binding like Shift or CAST. Just because Sammy C hasn’t blown a knee hucking on his with the toes locked doesn’t mean you’ll be as lucky.
Black Diamond Tecton
This one flies a little under the radar with the NS crowd, but shouldn’t. It’s light, skis about as well as a Kingpin, and is probably a little safer. It’s a great option for someone who wants to walk long days but also go big and fast.
Personally, I tour most days on its little brother, the Vipec. It doesn’t charge quite as hard on the down, but it feels great, and I haven’t had any pre-release issues after hitting a bunch of booters and cliffs on it.
Daymakers
Daymaker makes a touring adaptor that fits in just about any boot/binding combo. It's cool, but at this point, if you already have Pivot 18's you might as well just spend the same amount of money to get CAST, or even Shift if you have an industry deal. I don't see any reason to carry big adaptors in your pack in 2020.
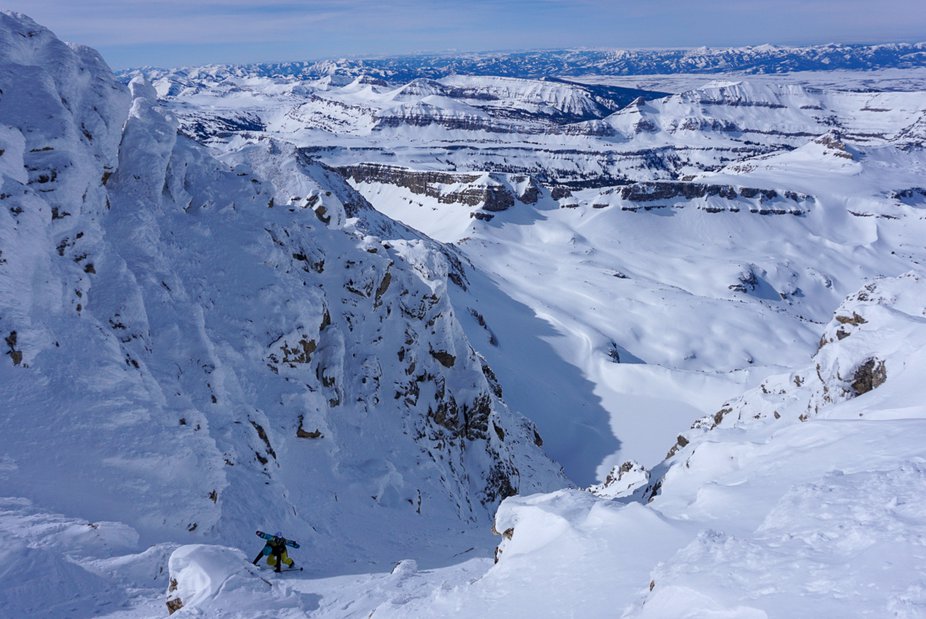
My first pair of skins is by far the purchase that has taken me the furthest as a skier and a mountain person.
_
Skins
For most folks starting out, a nylon climbing skin is your best option. Big Sky Mountain Products makes the best value climbing skins I’ve found. (and I said that before I started working with them.) They’re affordable and really durable. I’ve been on a huge range of skins, including some expensive euro ones, and I keep coming back to BSMP. They’re really good. Even if they weren’t a cool company run by good people I would only skin on their product at this point.
Otherwise, BD’s nylon skins are good to start out. Anecdotally I, and a bunch of friends have had negative experiences with a range of G3’s skins. They just aren’t that durable. I’d recommend spending your money elsewhere on skins that will last longer.
This guy makes BSMP Skins. He's pretty cool.
_
Outerwear
Wear your inbounds gear to start out in, as you get more into backcountry skiing you’ll probably want lighter and more breathable options, but initially, your Saga or FD wear is fine. Don’t listen to the crotchety old men who will give you a hard time on the skin track.
_
Pack
Get a slightly bigger pack than you think you need, it’s always easier to cinch down any extra space, but you can’t create volume in too small of a pack. Make sure you’ve got a separate compartment for your avy tools, and a good way to carry skis. Also, make sure that your pack can fit all your gear, and your skins at the same time. Otherwise, the Dakine Heli Pro you used to carry books in highschool will be fine to start out.
_
Conclusion
Holy crap! That was a lot of info! But hey, backcountry skiing is really fun, and having the right gear makes it way more fun. Stay tuned for some less drawn-out articles breaking down technique and tips.
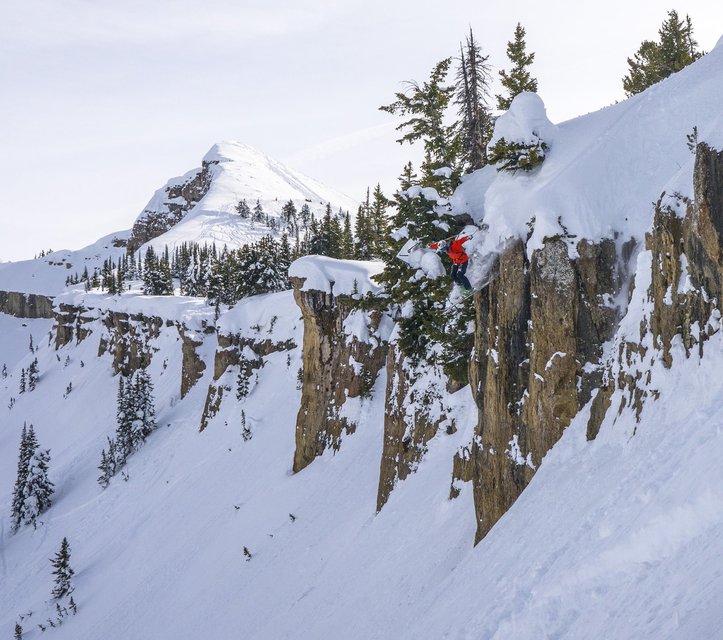
Get into touring so you can build jumps with powder landings. Keep doing it so you can go ski stuff like this.
Comments