It looks like you are using an ad blocker. That's okay. Who doesn't? But without advertising revenue, we can't keep making this site awesome. Click the link below for instructions on disabling adblock.
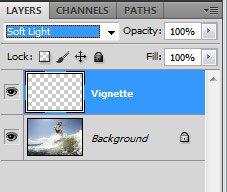
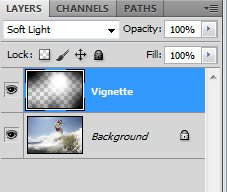
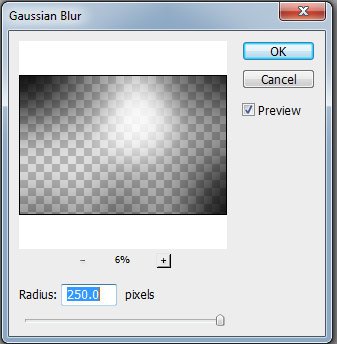
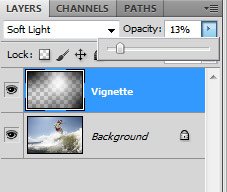
We have added a little twist to the meaning of Vignettes, making it one of those adjustments that could change the overall appearance of any image, more than any vignette you've ever seen. This should be one of the last things on your workflow list, right along with sharpening. When you first look at an image your eye goes to the faces(if any) and the brightest parts of the image. This subtle adjustment does just that by darkening the very corner of the image and brightening the subject just slightly.There are many ways to do this, but our favorite is to use an empty layer in Soft Light Blending Mode and then paint on it with Black to darken and white to brighten.Start by creating a new layer and setting the blending mode to Soft Light.Then choose the Brush tool and make it as huge and as soft as is possible.Now choose black for your foreground color, and zoom out of the image until it is fairly small in the middle of the frame. Use the edge of the big soft brush to paint all four corners. Don’t worry when it looks too dark, we are going to fix this in a second.Now select White form your color palette, and adjust your brush size so it is slightly larger than your subject( or the important part of the subject) and click or draw a circle right over it.Go to Filter>>Blur>>Gausian Blur. From the Gausian Blur dialogue move the slider all the way to the right.Now the Black and White spots that you made just a moment ago should be a nice blend and all you have to do is lower the opacity of the layer to what is suitable for each image. Usually a pretty low percentage because you want this adjustment to be very subtle, something between 5-15% should be pretty good. Immediately after applying these adjustments, you are going to see how the focus moves to where the brighter spot was, although you haven’t changed much.Every little adjustment makes your images better, as long as you're not overusing it. Make this a part of your workflow and you will be one step closer to perfection.


Comments