It’s finally September, the leaves are starting to change, the nights are longer, and the diehards have bookmarked ski hill webcam pages, waiting for that first dusting of snow. But, while you wait, why not be productive and get to work bedazzling your ski gear?
I’ve been flirting on and off with painting my own skis, helmets, and occasionally other gear for about the last six years, ever since I painted my first pair back in 2015. Here’s the thread I made then.
Since then though, I’ve learned a lot, and am using a different process and materials, so I figured I’d update that tutorial, along with providing more in-depth info to hopefully help out any budding ski artists.
First I'll going to answer the obvious questions that I get asked every time I paint a pair of skis:
Are they durable?
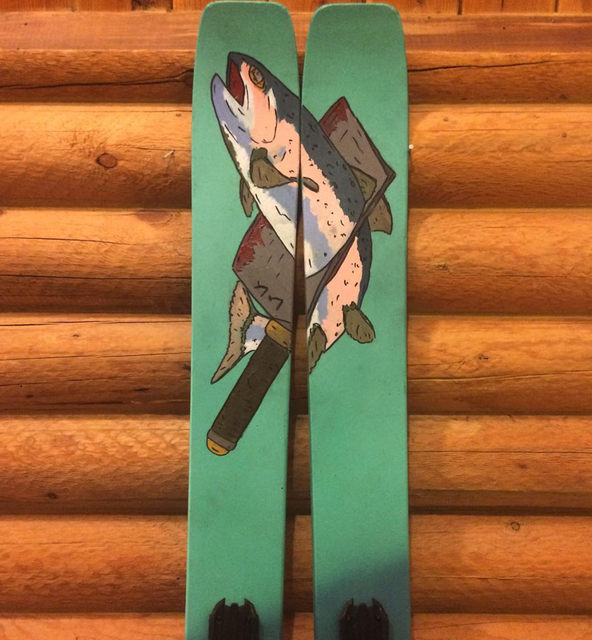
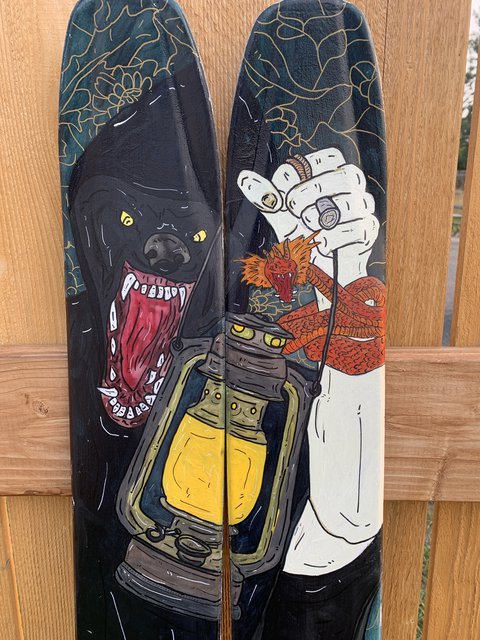
Yep! The first three pairs I painted were finished with a one part clear polyurethane finish. All three pairs got skied, hard, and all have held up well, even with that cheap and easy finish. You’ll get some chipping on the sidewalls at the tips and tails, but it’s really not noticeable, and it doesn't really spread. The Moment “Deathfish” I painted lasted fine through around 60 more days of skiing after I painted them.
Why not just get a vinyl wrap?
I’ve tried the vinyl wrap thing, and in my experience they’re expensive, hard to install well, and really not durable. So sure, give it a shot, you’ll get a more precise graphic, but it might not last for long.
Do they make the skis heavier?
Yes, they do, but it’s minimal. For the latest pair I painted, the skis started out at 1743 and 1713 g. After sanding, priming, painting, and clear coating, they weighed 1781 and 1757 g, which means that on average, the skis gained 41 g each. That’s negligible weight in my book, after all, 41 g of weight gain is roughly equivalent to 7 US quarters - basically nothing spread out over a 184 cm ski.
Why not just get custom skis?
Because they’re silly expensive. Nothing against custom skis, I just don’t have the dough, if you do, that’s cool.
What materials should I use?
There are a lot of options, in general, you want to use acrylic paints or paint pens. There’s a complete supplies list at the bottom, but it’s long and boring, so read the fun stuff first.
Why?
Skiing is all about expression, and while plenty of brands make awesome graphics, there’s something really special about dreaming up your own art and then putting it on a pair of skis you love. So, if you’re content with your stock topsheets, awesome, if not, read on!
Creating a Design
The first step is figuring out what you actually want to put on your skis. I’m not going to give you much input here on what to draw, but here’s how I do it. First of all, measure your ski’s actual dimensions. Take a tape measure and figure out how wide, and how long they are. Those dimensions will decide the aspect ratio of your canvas.
Then make yourself a template. You don’t want any of the cool parts of your drawing to end up under the bindings, or between the edges of the skis. Here’s an example of a template I made. You can either take a picture of your skis and use that as your template, or just grab a stock photo of the current topsheet off the internet and trace around that.

Once you’ve got that figured out, start doodling! Remember, you’ll probably be drawing your mockups at a much smaller scale than the ski will actually be. So you’ll have lots more room for detail on the actual ski as opposed to the mockup you’re doing now. I use the ipad app Procreate for this, it’s an affordable and powerful drawing app, but you can also use Photoshop, or just a pencil and paper. Play around with ideas, keeping in mind how the ski will look on your feet, while you’re riding the lift, and while you’re standing in line.
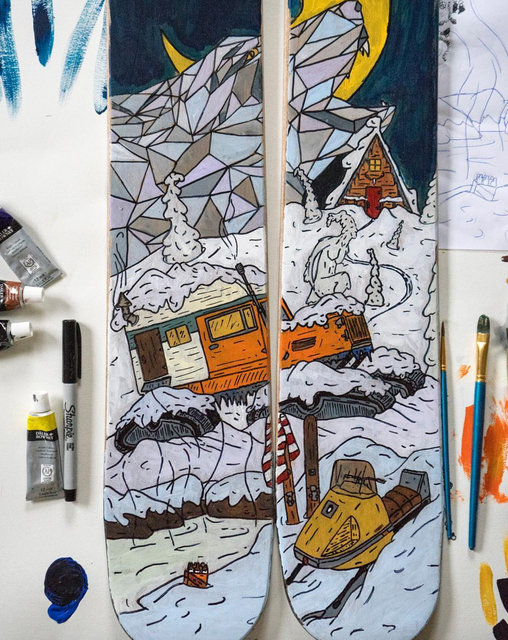
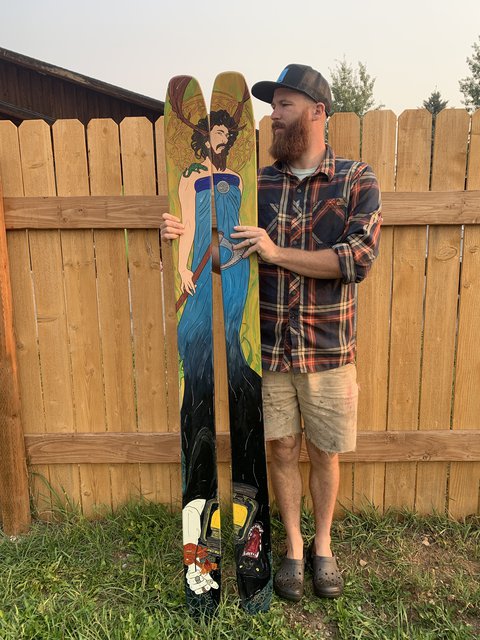
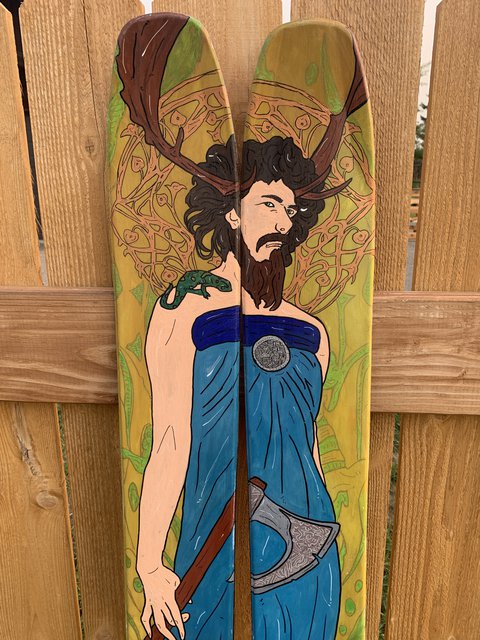
Come up with concepts that make you happy, who cares what anybody else thinks? I ended up with a Mucha style art nouveau Loki on the tips, melding into Jörmungand and Fenrir on the tail, because I just finished reading The Witch’s Heart which is, incidentally, a great book that really resonated with my Norse heritage. So, here’s the design I came up with.

Ski Prep
Once you’ve got an idea of what you want to paint, it’s time to prep your skis. Using a #3 Pozi, pull your bindings off the ski. It’s a good idea to slip a little wad of paper into each binding hole to keep it from filling with paint. Then, sand the skis. It’s up to you how much you want to sand them, I usually do a pass with a 120 grit, and then with a 240 grit, trying to get them as smooth as possible, while still having a little bit of tooth. Dust them off well. Rubbing them down with isopropyl alcohol and letting them dry is also a good idea.
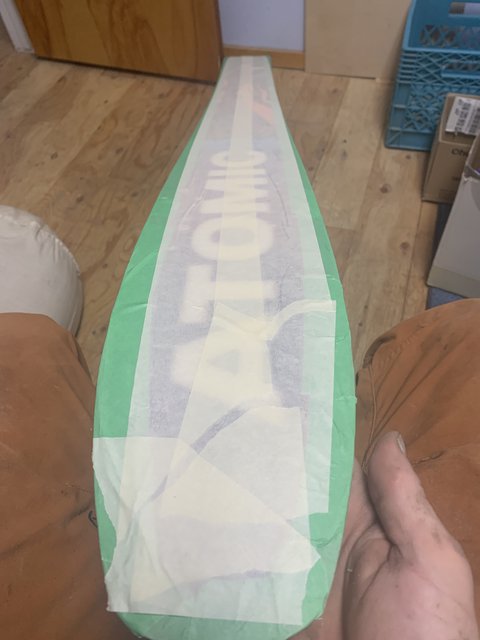
Once they’re sanded, tape them off. You’ll obviously want to cover the bases completely in tape, and in my experience, it’s a good idea to tape off as much of the sidewalls as possible. Try to tape along the line where the sidewall was pressed into the topsheet, and smooth the tape down well.
Then, it’s time to hit them with a primer. Almost all skis have a plastic topsheet, so I like to use a plastic spray primer from the hardware store. Keep in mind that the color of your primer will affect how easy or hard it is to cover it with paint. A light primer will make it easier to paint lighter, vibrant colors on top of it, while a darker primer means blacks, greys, and dark blues will have better coverage. When in doubt, go with a white primer. Read the instructions on the can, and follow them, hitting the skis with around 3 coats, sanding in between.
Transferring the design to the skis
This is the first really tricky part, and you’ve got several options. If it’s a simple design, and you’re good at sketching, you can just freehand it onto the skis with a pencil using the grid method, or just by eyeballing it. I’m terrible at this, so I’ve developed another method. I print out my line drawing on a bunch of sheets of paper, and then tape them all together so that I’ve got a full size printout of the graphic. Then I tape the skis together, and to my work table so they can’t shift around, it sucks when the graphic isn’t aligned between skis.
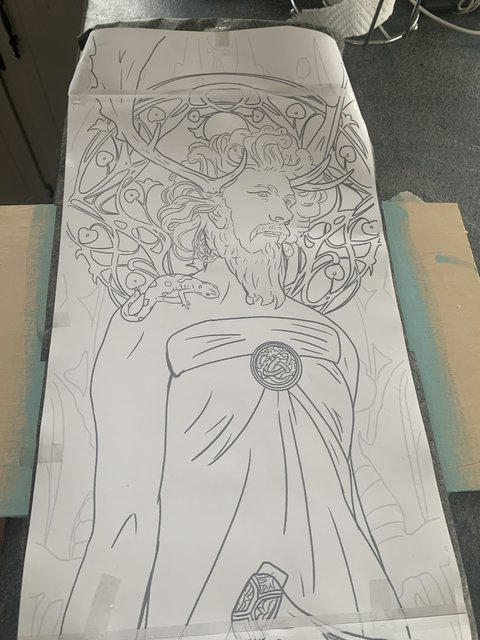
Now it’s time for a magic trick. Grab some carbon paper (sometimes called transfer paper), your local hardware, or art supply shop should have it. Carefully tape enough sheets together that they cover your topsheet, making sure that the tape is all on the top, lighter side. Lay the carbon paper over your topsheet with the transfer side down, and then gently tape it down. Then lay your printed out design over it and tape it down as well. Once that’s all secure, gently trace your design with a ballpoint pen, pressing down with firm pressure. The carbon paper will leave your linework, perfectly traced on the ski. There might be some light smudging, but it’s easy to clean that up with an eraser.
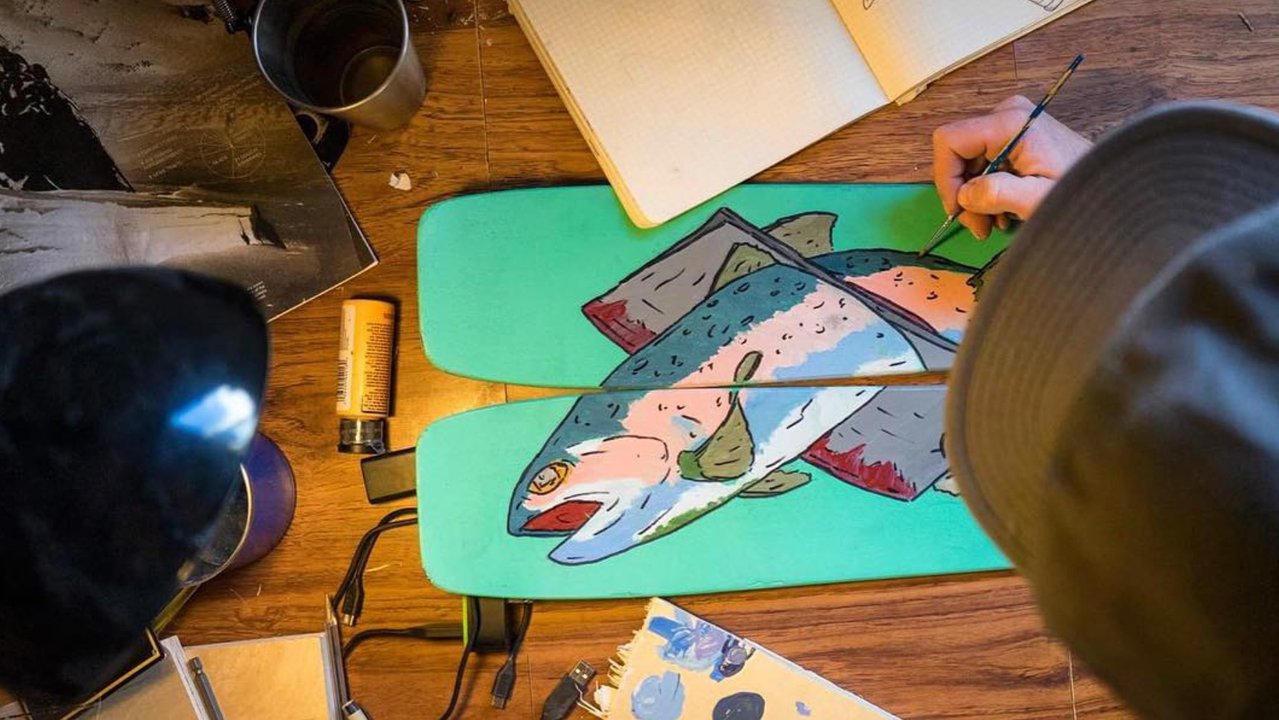
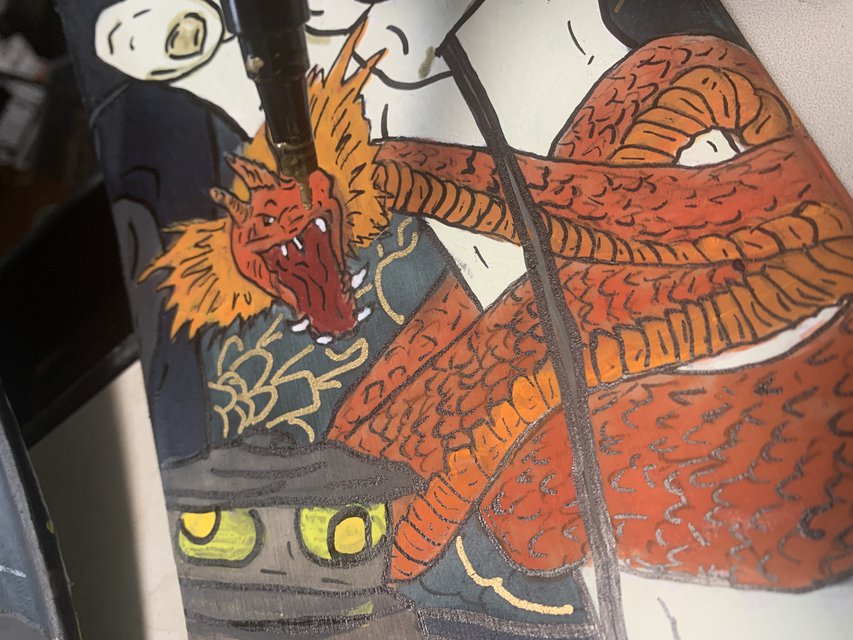
Painting the skis
Once the linework is on your skis, you can get painting. Fill in colors gradually, working from light to dark, and applying extra coats as needed. Remember that several lighter coats will look better than one really heavy one, so don’t be afraid to work slowly and build up color gradually. Once everything is colored to your satisfaction, I like to go back over with a paint pen and hit the linework again, and add some texture. This is the fun part, so go ham, and get creative.
Clear Coating the Skis
If the skis are just going on your wall and won’t be skied, they might not need a clear coat, but if you are going to ride them, it’s worth clear coating them. Let them dry for at least 24 hours, and then you can start clear coating. If you’re using a one part clear coat, just follow the instructions on the can, re-applying coats at the intervals they recommend. Do as many coats as you have patience for, the thicker you can get that clear coat, the longer they’ll last without chipping.
If you’re using a 2K clearcoat, follow the directions on the can as well, and after three coats, you can let them cure for 24 hours, wet sand, and then coat again, if you’re looking for an ultra-smooth finish. Personally, that’s overkill for the skis I’ve painted, but all power to you if you want to achieve an automobile style finish.
Mounting and riding
Once the clear coat has cured, pull the tape, and clean out the binding holes with compressed air. Remount the bindings with wood glue, and to avoid messing up the threads in the holes, gently spin the screws “out” by hand until they fall into the existing threads, once they do you can tighten them down. Then go ski! But be prepared for endless questions about who makes your skis.
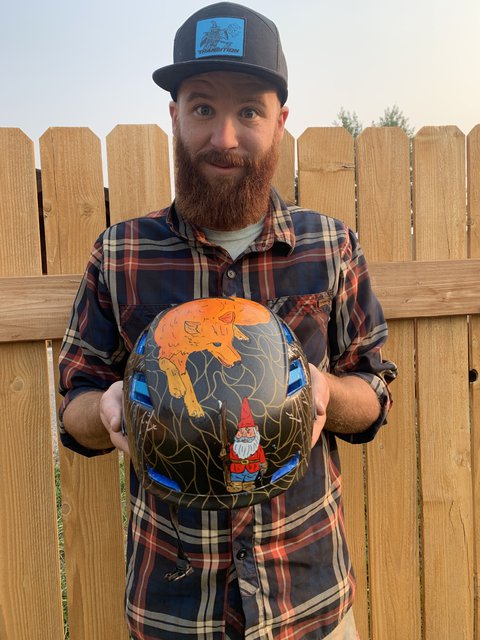
What if I want to paint other ski gear?
Then you should! Helmets, boots, and poles are all prime candidates for some paint. That said, there are a few things to note that can be different.
When it comes to helmets, some paints can potentially degrade the helmet’s plastic. So you might, potentially be making your helmet less safe. I feel fine painting my own helmets, but it’s your brain, so make your own risk calculus. If you do paint a helmet, be VERY careful when you mask it off to thoroughly cover all of the foam. This is the part that is most likely to be degraded by aerosols, so don’t let any spray paint, primer, or clear coat touch it.
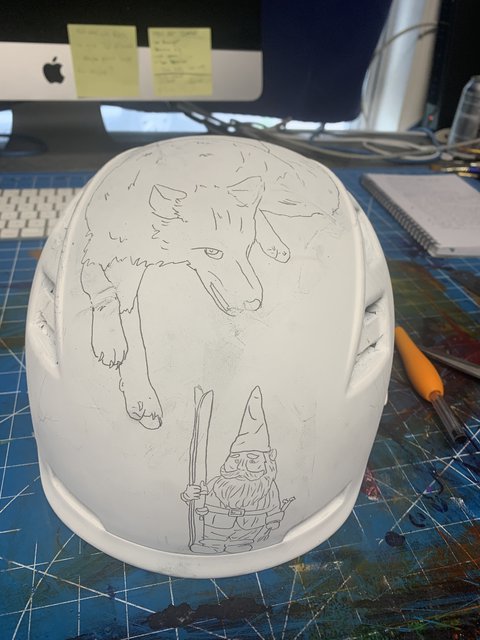
With helmets, prep is especially important, take as long as you need to mask off the helmet, it will pay off later. Transferring designs to helmets is a lot harder, but you can still use the carbon paper trick, just make sure it’s taped down securely.
It’s fun to paint poles, but they get beat up fast and aren’t a very big canvas. Feel free to paint yours, but don’t expect them to hold up.
Boots are similar, they get dinged up a lot, and don’t show off your art as well. I’d recommend sticking to either dying them (check Gear Talk for tutorials from the old days) or just doodling on them with a paint pen. They’re not worth fully painting and clear coating if you plan on actually skiing in them.
Random Tips
Skis are a weirdly shaped canvas. It’s a good idea to look at a bunch of ski graphics, and figure out what you do and don’t like, before you start sketching. It’s a hard space to use efficiently, but some artists do a really good job of it
Spray paint and clear coats are really temperature sensitive. That’s why it’s a good idea to paint your gear now, not in February when it’s too cold for the paint to cure. Read the instructions on the can, and follow them.
The better you prep, the better your finished product will be. Take your time taping and priming your gear.
Think about how your topsheet graphic will look on the snow, will it pop in a whiteout? And think about how it interacts with any existing base graphics.
Get weird, have fun, what’s the worst that could happen?
The materials I use
I’ve experimented a bunch with different ski gear painting materials, here’s what I’ve come up with, along with notes about why I like them. These aren’t affiliate links, and most of these products are available on Amazon, but it’s a good idea to try to shop local when you can.
Alpha Enamels are freaking sick, and so expensive. I don’t own any, but if I could justify them, I would. If you want to ball out (or get me a great Christmas present) these are the bomb. Great coverage, incredible durability. So nice. So expensive.
- Most Affordable Paint Option
The Folk Art Acrylics are a great bang for your buck. Most Ace Hardware stores carry them, as well as craft stores. They’re easy to work with, pretty durable, and easy on the wallet. I highly recommend starting out with these.
I have a set of these Army Painter Miniature paints that I use for just about everything, and they’re great. They’re more expensive than Folk Art paints, but have a great color range. The only downside is that they’re small bottles, so don’t use them for covering huge sections of the ski or else you’ll run out.
Paint markers are pretty sweet for doodling on all your gear. These are a great place to start, they work well and are reasonably affordable.
I’ve tried a bunch of black paint pens for details and outlines and in my experience, these are the best. They give a nice, fine, consistent line, are affordable, and last a long time.
I bought these on a whim from my local grocery store and have been pleasantly surprised. I use the “extra fine” size, for just about everything, from painting on skis to adding highlights to gouache paintings, to marking skis to mount them. Worth having in your desk.
I like these brushes, but I also think brushes are pretty personal, and for your first few projects, a cheap variety pack from a local craft store is a great place to start.
This stuff has been a revelation. It’s narrow, and designed to follow the contours of curved car panels, so it’s easy to tape off irregularly shaped things like helmet vents with no wrinkles. You can also get really creative with color blocking or doing cool patterns. A roll will last you forever, and opens up the door to a lot of creativity.
- Regular masking Tape
Buy the green stuff at a local hardware store. Make sure to smooth down the edges any time you use it.
- Carbon Paper
The general store a few blocks from my house carries 8.5x11” Mead carbon paper, so that’s what I use. But, if I was going a lot of skis, I’d get a roll of this. It’s perfectly sized so you don’t have to tape sheets together, and you could get a bunch of graphics out of a roll that size.
- Spray Paint
Buy the colors you like locally. Make sure it’s plastic-friendly, read the instructions, and get the finish you want. Satin is usually a nice look on skis.
This is the premium option, and is probably best reserved for coating helmets. I just did my first pair of skis with it though, and we’ll see how well they hold up. It’s basically a spray epoxy that dries very hard. Follow the instructions, use a respirator, don’t get it in your eyes, wet sand it to get that super smooth finish.
This is what I’ve used with pretty durable results. Your local hardware store should have it cheaper than that website. Just make sure it’s non-yellowing, outdoor-friendly, and the finish you want. I’ve also used a similar product in a can that says “Spar Varnish” with good results. Follow the instructions on the can, and put on light coats. Nothing sucks more than ruining your paint job with a bad clear coat.
Conclusion
So there you have it! That’s how I paint my skis. I’m fully convinced that skiing is way cooler when we all take the time to express ourselves through our gear as well. So if you’re on the fence, paint your skis, or your helmet! It’ll be awesome. And feel free to post any art projects in the comments, I’d love to see them.
Comments