
SNOW the Game is an excellent computerized freeski game that is developed for the Windows platform. I have seen many people ask the developers when the game will be released for Mac, only meeting sadness. Hopefully this article will help, although I can't guarantee it will work. If there is an issue, write the problem below or in the forums, and maybe we can all help to get it resolved!
For all that were wondering, I am running SNOW the Game on a 2011 MacBook Pro 15". It's original OS was OSX 10.6.8. To be clear, I have a quad-core 2.2GHz i7 and an AMD Radeon HD 6750M graphics card. I do not run the game on integrated graphics, so I do not have experience with that aspect.
What you will need:
- A Mac computer, although the newer the better. After some researching, it seems as if having an Intel chipset is required. You can figure this out by going to the apple icon>About This Mac. The name will be to the right of the "Processor:" section.
- Internet access
- A copy of Windows (I use Windows 7 64-bit)
- Lots of free space on your computer
- Somewhere to plug your Mac in, as this process usually takes overnight.
- Knowledge of how to use your computer
Not necessary but recommended:
- Backup drive
- The DVDs that came with your Mac
- Food
Pre-Step
Read through these directions and see if anything cannot be done by your system BEFORE you go through the work of installing Windows.
Step One: Update and Back up data
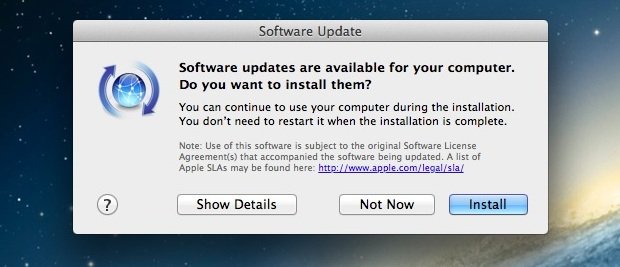
First, click on your Apple icon>Software Update. It will check for new software and prompt you with a larger window displaying the available updates when completed. Download and install them, and restart if necessary. It may look something like the following:
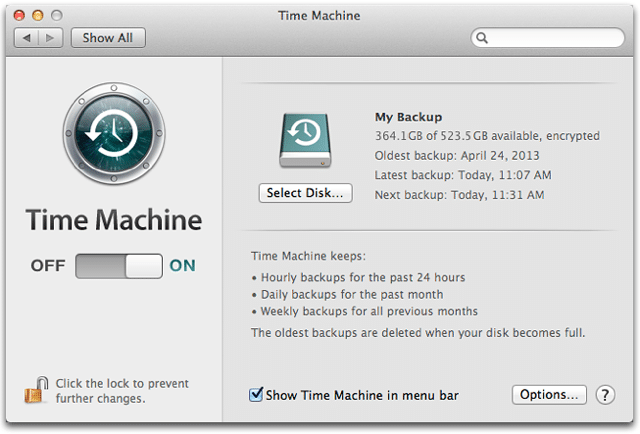
It is highly recommended that one makes a backup of their Mac before installing Windows. This process is not difficult. Skip to the next paragraph if you know how to do this. Insert the USB cable of the drive into your computer, and watch your desktop. If it is your first time doing this, a dialog should prompt you to answer if you'd like to make the drive your "Time Machine." Select yes, or the equivalent, and go to Apple icon>System Preferences>Time Machine. If the drive hasn't started making a backup already, select the "Show in Menu Bar" icon. Click on the the icon that shows up (it looks like a circular arrow) and click "Back Up Now." The backup should start. This will take quite a while, depending on the size of you HD and the space used. Mine took several hours the first time.
Now that we have a backup completed, you can remove the drive (by safely ejecting it, drag icon to trash or click the eject button in the Finder menu).
Step Two: Prepare your Mac for Windows
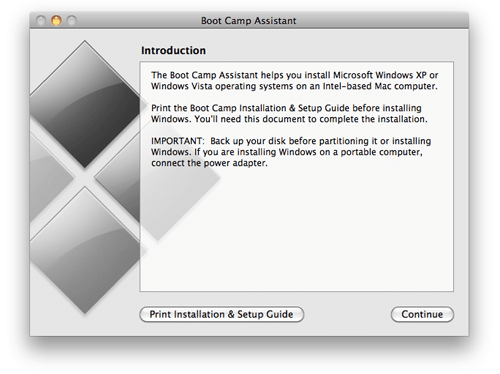
Locate under Applications>Utilities your included copy of Boot Camp Assistant. You can also locate this using Spotlight (upper right search icon) and typing "Boot Camp Assistant." Run the application. When the following window comes up, click "Continue."
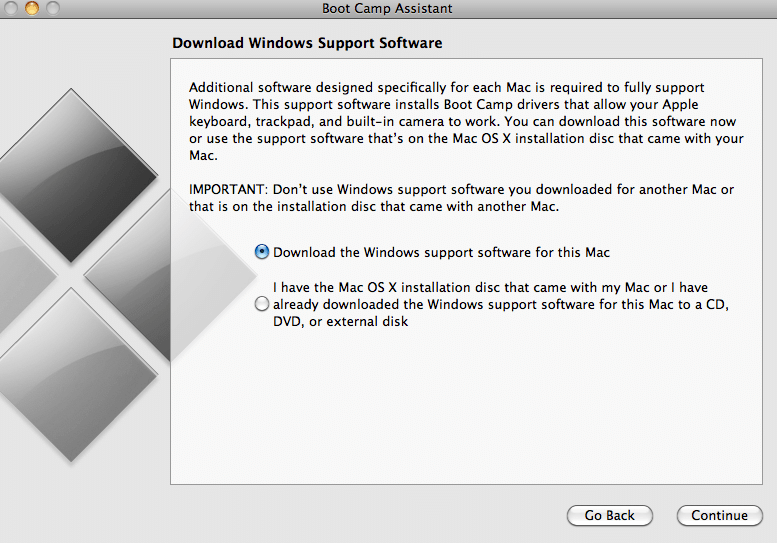
You will then be asked whether you want to download some support software, or use your Mac DVDs that came in the box. Select your option you will use. I installed using my DVDs, as I thought it would be simpler, and my internet speed is awful. Click Continue.
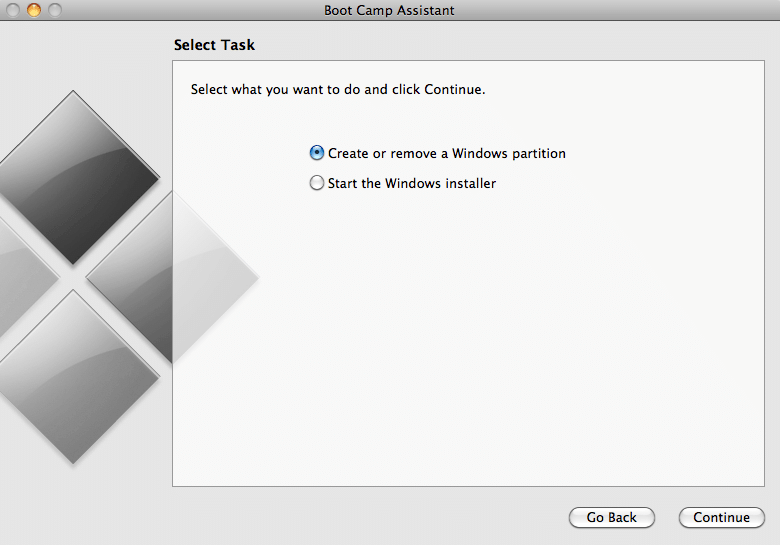
It will prompt you whether or not you'd like to make a new partition, select the "Create" option. Click Continue.
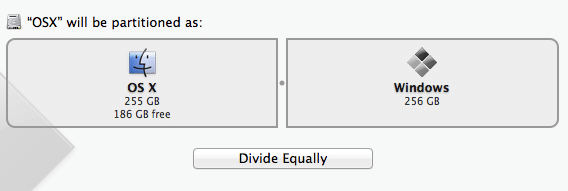
Now you will select how large your Windows partition will be. Be generous, as you cannot change this later. To change it afterward, you would need to delete, restore, and create the partition again. I quickly found that 100GB is almost too small after several games installed, so give yourself however much you think you can get away with, without taking too much from the Mac side. It's up to you. SNOW is several gigabytes, but keep in mind you may want to install other Windows games in the future too. Also Windows itself takes up quite a bit of space (Windows 7 alone requires 16 GB or so). Click Continue to partition. A status bar will progress, notifying you of the partition's progress.
Step 3: Install Windows
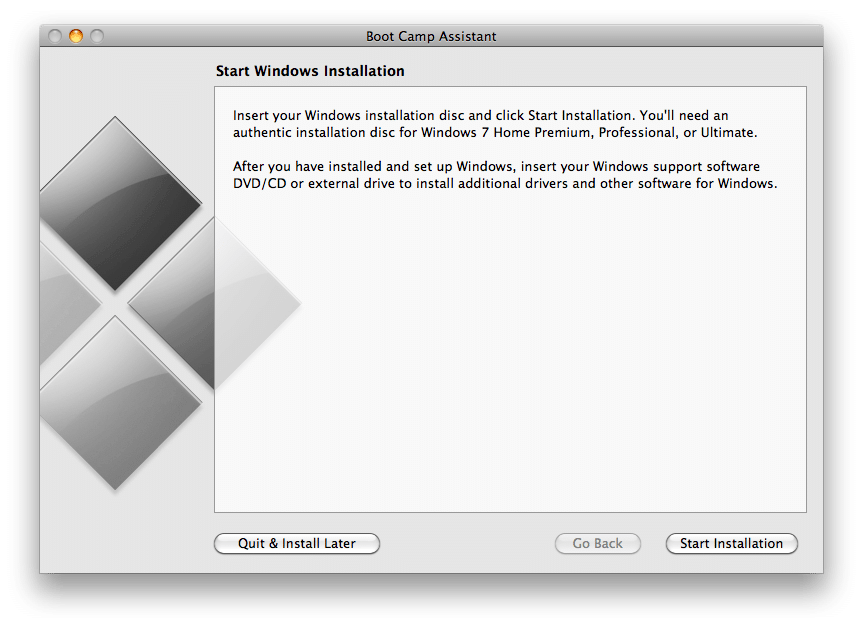
Now we will install Windows. Insert your Windows disc into your drive, or a connected drive. Boot Camp assistant should change the window, and you then click "Start Installation." It should look roughly like the dialog below. It may be different. Some versions of Boot Camp require different versions of Windows.
Sit back, eat food. Watch Windows install. If there are any issues, try the process again, or consult here or the internet. :(
Step 4: Install Drivers for Windows
Windows should have started up. It will guide you through the setup procedure. If problems persist, consult here or the internet.
You will now need to remove the windows disc in your disc drive (or not, if you used a flash drive containing Windows...although I guess you could eject that too). You can either do this by holding down the eject key if you have one, or navigating to the menu under Start>Computer and right clicking while selecting the "Eject" option. Now, insert your Mac DVD containing the Windows drivers. It is the one with the name of the Mac OS (I believe, if that doesn't work, try the other one. It can't hurt). Open the disc in Windows by double clicking it (can be found in the same method as when we ejected the other disc above). Click the "Setup.exe" and follow the directions when prompted. Refrain from closing things, as corruption may occur. If you do, just redo the process to overwrite the files. Worst case scenario means we have to reinstall Windows. Continue though any odd warnings. When completed, restart your computer.
Step 5: How to Boot into Windows
When you hear the startup chime, press the alt/option key and HOLD it down until a graphic of the two drives appears. Use the arrow keys to select a drive, hit enter. You can also configure manually under OSX which disk you would like to default start up into under the System Preferences. Any time you restart your computer or turn it on, it will boot into OSX and not Windows by default. Every time you would like to go into Windows, you will need to hold down the alt/option key unless other wise changed in the settings.
Step 6: Install SNOW
Navigate to the Internet Explorer icon and open a web browser. Go to the Steam website (http://store.steampowered.com/), and click "Install Steam" at the upper right.

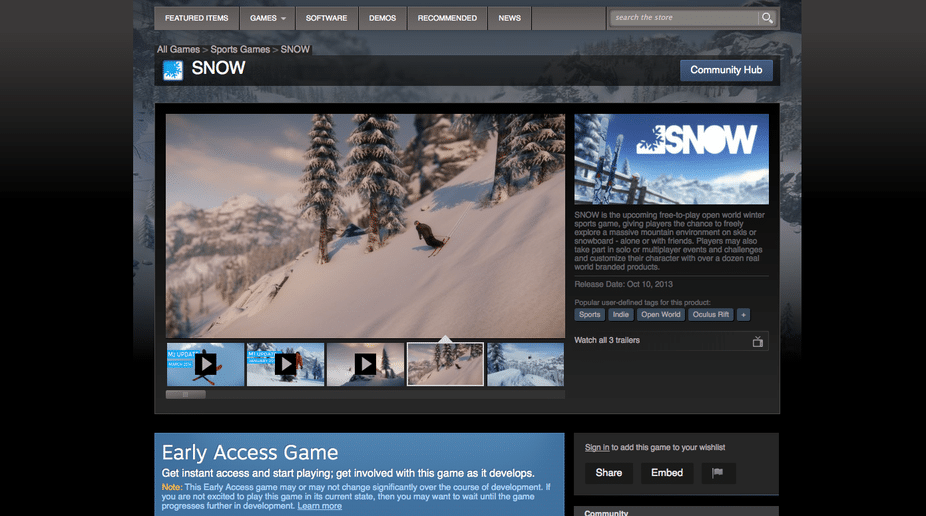
Install and download Steam. Once you open Steam, navigate to the SNOW the Game store page within the application. It should look roughly like this:
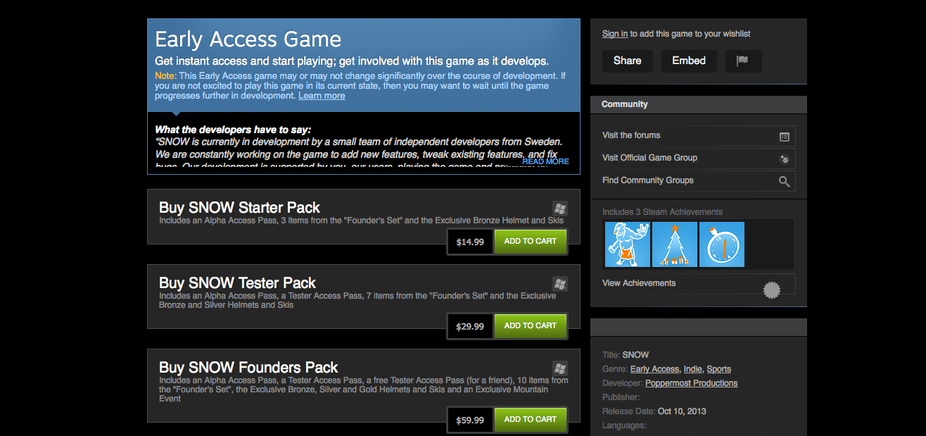
Then purchase the game of your liking:
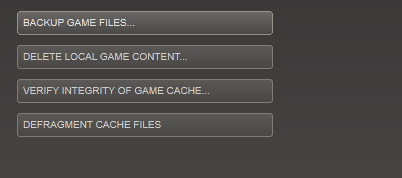
Download SNOW, then click "Play" to run the game. If any problems persist such as errors or other things, try defragmenting or verifying the game files under the Properties menu in Steam of SNOW. If more issues persist, try deleting the game and reinstalling.
If anything you try simply cannot run the game, share your problem in the SNOW forum here on NS. The game is currently in Beta during the writing of this article, and still has bugs. Have the developers assist you. They are usually pretty quick about coming up with resolutions.
I hope this helped! I did my best (this is my first article), and please let me know if it worked, what things are missing, any tips for others, etc. Happy skiing!
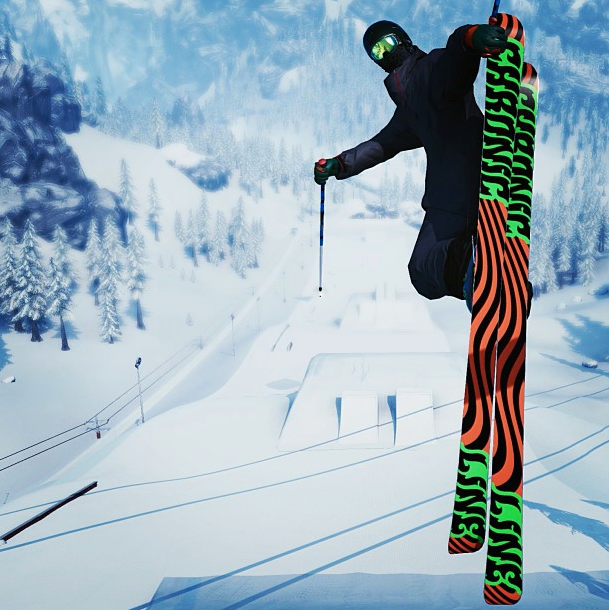
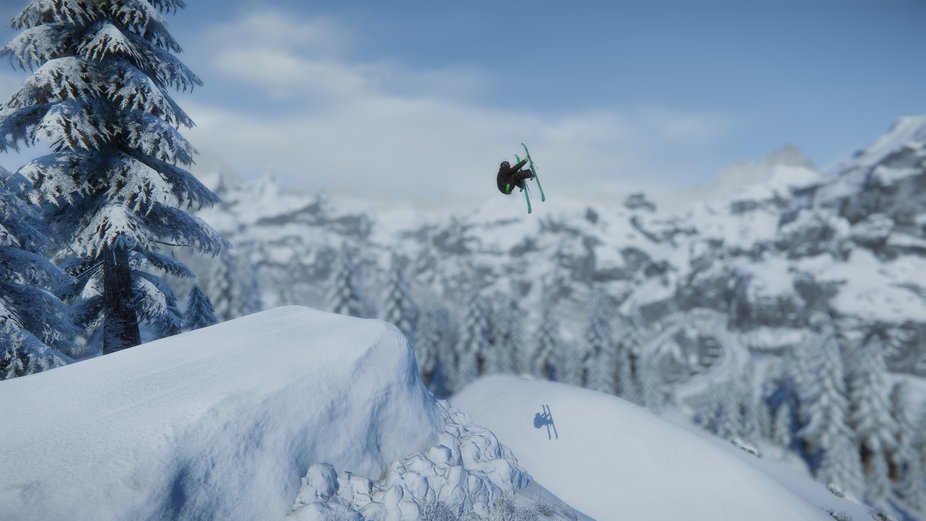
(Early Beta photo)
Want to give credit to PC World for helping me remember some details that I'd forgotten, and also a great source for learning how to do this:
http://www.pcworld.com/article/249059/how_to_install_boot_camp_and_run_windows_on_your_mac.html
Also want to give credit to Poppermost Productions as the creators of the awesome game:
Thanks!
Comments