It looks like you are using an ad blocker. That's okay. Who doesn't? But without advertising revenue, we can't keep making this site awesome. Click the link below for instructions on disabling adblock.
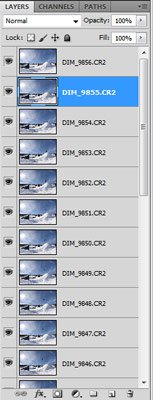
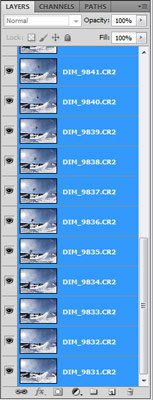
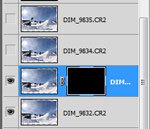
In the "Action Sports Sequence – The Shoot" article we pointed some of the key components for a great sequence. Now that you have all the good ingredients, it is time to put it together. At this point you should have Photoshop up and running!There are few different ways to create a sequence composite, in this article we are going to show you how to Photoshop a sequence like APS. This example is from Winter X Games 15, it was shot without a tripod and we have 35 images to choose from.Load every image from the sequence you shot as a Layer in Photoshop. If you are using LIGHTROOM you can select multiple images under the Library Module, click with the left mouse button and select Edit In >> Open as Layers in Photoshop..
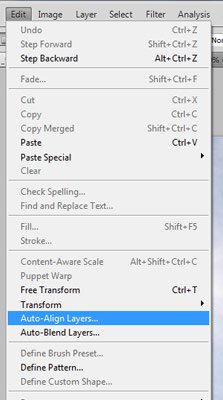
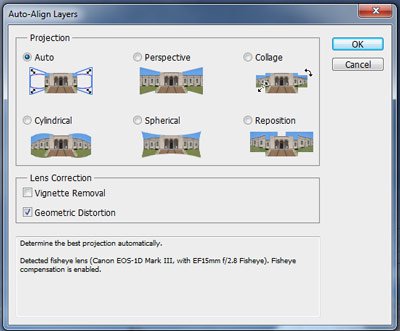
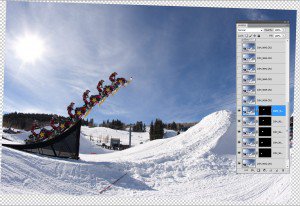
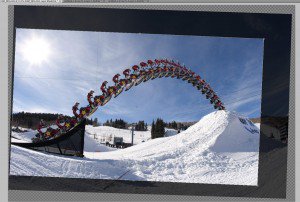
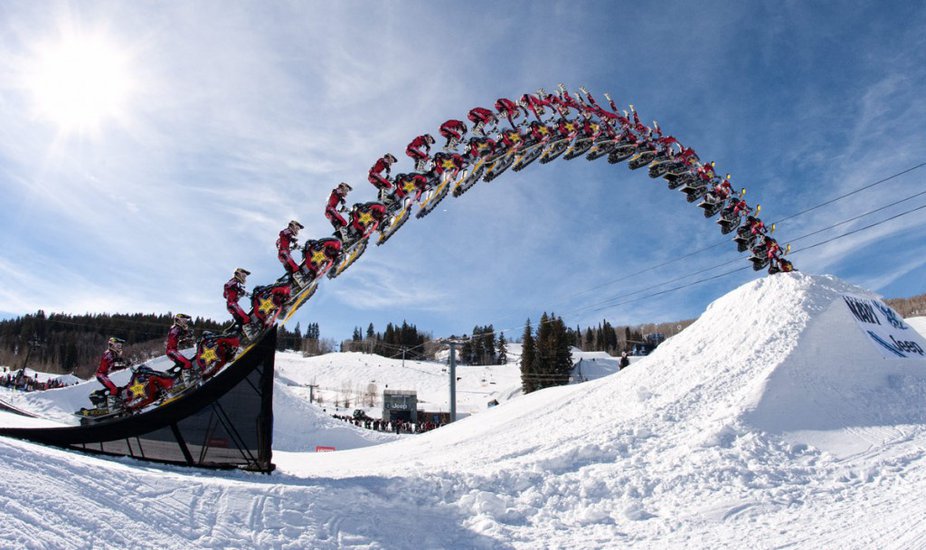
You should have all the Layers stacked so the first image from the sequence is on the bottom of the stack as Layer 1(or the lowest file number). Now select all of them by Clicking on the first one and then Shift + Clicking on the last one.Now we need to align all the Layers and photoshop is going to help us. Go to the top menu and select, Edit >> Auto-Align Layers. On the tab leave it on Auto or select Collage and click OK. Under the Layers palette click on the eye Icon in front of every layer so that only the bottom TWO Layers are visible.Starting from the bottom layer and working your way up through the stack means that the next image will be on top of the first one, sometimes the sequence is better when you start from the top and you work your way down. This is very important and you should think about it before you start working on the composite.Go to the second layer up (second from the sequence) and while holding the Alt key, click on the Mask icon to create a black mask for this Layer. This way only the first layer is visible. If you have an idea where the athlete is located in the second layer relative to the first, then you can start revealing it by painting with white over the second layer's mask(that should be black). If you are not sure exactly where the athlete is you can lower the opacity of the second layer to about 40-50% to be able to see the layer that is masked and paint it to fully reveal the athlete in the second frame fully. Once you have most of it revealed slide the opacity slider back to 100% and use the X key to quickly switch between Black/White to cover the parts you don't want and uncover the ones you do want.Now click on the eye icon for layer three, make it visible, create a black layer mask and lower the opacity if necessary. Basically repeat step 6 as many times as the number of layers. If your background is not very busy, you should go through all the layers pretty quickly. Make sure you stay pretty close to the subject with your mask, because sometimes if the sky gets lighter from one side to another a halo caused from your mask could appear around the subject. Click on the graphic to see it big Select the Crop tool and crop the images so there are no white corners. If it happens that you have a white corner or something, use the Clone and Stamp tool to get rid of it. If you have to correct too much we would advise you to just use a crop. Click on the graphic to see it bigNow that you have the sequence assemble, apply all the adjustments you would usually apply to your images for editing.If you don't get great results the first time, shoot another one while keeping all the tips in mind from the "Action Sports Sequence – The Shoot" article and try this method again.Enjoy!


Comments