It looks like you are using an ad blocker. That's okay. Who doesn't? But without advertising revenue, we can't keep making this site awesome. Click the link below for instructions on disabling adblock.
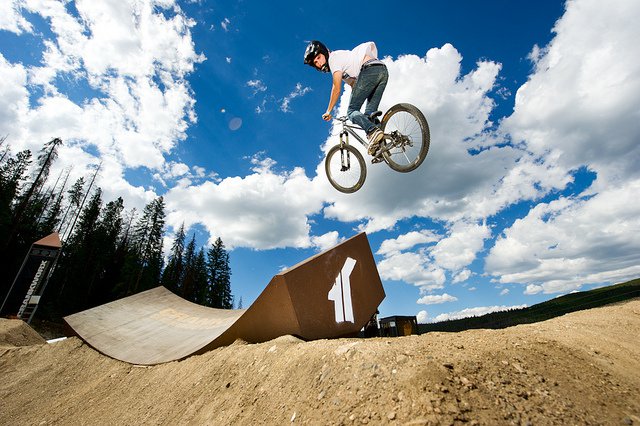
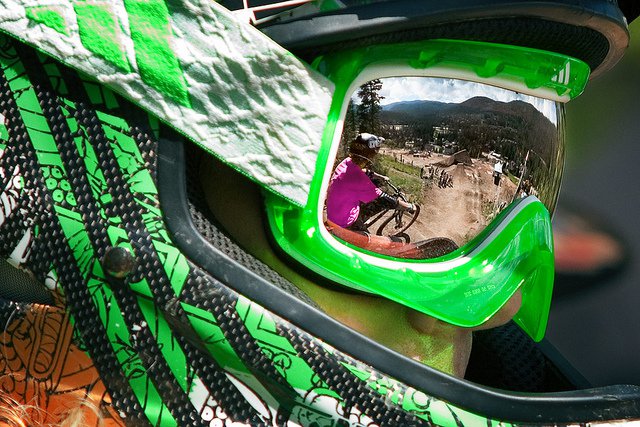
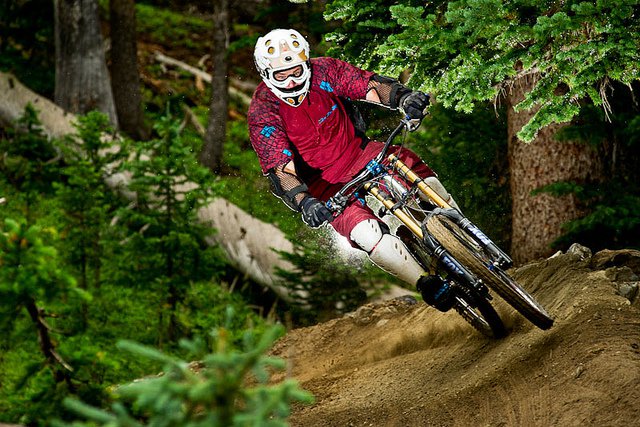
Every extreme sport has a somewhat different style for shooting. Mountain bike photography is no exception to this rule. It presents it's own slew of challenges that take some work to master.If you haven't read it already, it may be best to start off with our 10 Tips for Mountain Biking Photography Article. Once you feel like you have these down, it's time to move onto these advanced tips. #1: Set the flash low enough to get under the helmet visor when off camera. A well lit face can be the difference between an awesome shot, and a throwaway. Do everything you can to show off the facial expression to make the photo have more of an impact.Shot captured using Pocketwizard Mini TT1 and Plus II using hypersync for fast shutter.#2: Use HSS or Hypersync. If you have the new PocketWizard system with FlexTT5's then you can shoot using Hypersync. This mode lets you get a higher flash sync speed so you can shoot with action stopping shutter speeds, without losing power. If not, you can likely use High Speed Sync depending on your flashes and how you are triggering them. You will have less power so you may need to shoot 2 flashes next to each other in this mode, but you'll get a nice fast shutter speed to stop the action!#3: Choose the right lightstand for the job. Lightstands typically do not have adjustable legs. This makes it tough to use them on uneven mountainous terrain. There are a few options that work well, like LumoPro's LP605 that has spikes to help keep it even on the ground. But really the best options are cheap tripods from Wal-Mart. They have adjustable legs, cost less than $20, and you won't worry about them getting beaten up or run over.#4: Use the motion blur, flash, ND filter technique. This creates really cool and unique results. You can read all about it here.#5: Mount the camera on the bike and trigger it remotely. This creates some truly remarkable images. Make note that you'll need a special trigger cable and radios to make this happen. The cable is called motor-drive and will also keep your camera awake so it triggers right away. Lock focus as well.#6: Don't forget about the lifestyles! You'll notice this one is a repeat from the basic tips article, but thats because It's easy to get caught in all the action, when often times the most salable shots that appeal to the masses are lifestyle scenes. Shoot like a documentary and try to capture the moments that count, not just the action!#7: Shoot biking at sunrise or sunset with multiple flashes. This way you get the best sky possible, and with multiple flashes you are literally creating an outdoor studio scenario. Another great time to shoot is at night, but you and your athletes will need good lights to see what you're doing.#8: Fight spotty forest lighting. Alright, so the article says 7 tips, but since #6 is a duplicate from our last mountain biking post, we cranked this one to 8! The best way to fight spotty forest lighting is by using a flash. Underexpose by a bit and bring the flash in to compensate on the athlete. This will make the lighting look much smoother! However, If you have a wide enough spot of sunlight, try capturing the athlete there and you won't even need flash!Two Flashes used, one in front and one behind to light up athlete and dirt flying through the air.


Comments