It looks like you are using an ad blocker. That's okay. Who doesn't? But without advertising revenue, we can't keep making this site awesome. Click the link below for instructions on disabling adblock.
Welcome to the Newschoolers forums! You may read the forums as a guest, however you must be a registered member to post.
Register to become a member today!
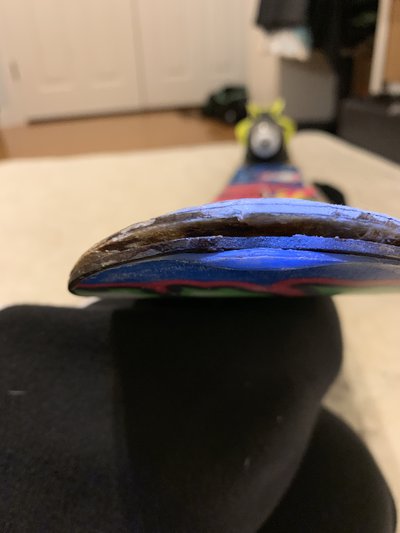
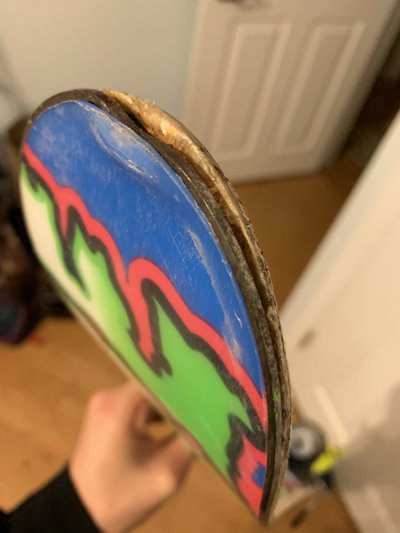
The only problem is that part of the metal edge bent into the ski and the base cant lay snug with the ski. I think im gonna sand down the tip of the base and when it fits snug just epoxy the shit out of it
Surface prep is very important for epoxy to bond correctly. Thread a piece of coarse sandpaper bewteen the delaminated layers, preferably the plastic backed stuff so it doesn't tear apart, then blow out the dust with compressed air if you can, gently spreading apart the delamination but not causing it to spread further. Clean everything out with iso alcohol
I like to use Devcon 2 ton epoxy for ski repairs. It's important to have everything prepped to go before you mix the epoxy, but this does have a decent working time. It comes with a little stir stick, but you might want to cut a piece of thin plastic from the packaging to get the epoxy deeper in the crevice. Make sure to get a good coating on every surface that has delaminated, but not too much that it makes a mess.
Once you have it all coated up with epoxy it is time for clamping. First wipe off any excess from the outside surfaces, then place a layer or two of plastic wrap on the ski. I like to use a couple pieces of 2x4 to sandwich the ski between and act as jaws for the clamping. These will provide more even clamping pressure, but deform just a little bit to the irregularities in the surface of the ski, you can also place a piece of rubber cut from a bike tube between the jaws and the ski to provide more even pressure.
Once everything is in place, start tightening the clamps, you could probably get away with a single C clamp, but it will be good to have a couple in your toolbox for future repairs, they're cheap. Make sure that the clamp jaws are centered over the ski, and not inline with the edge so that they are applying force directly perpendicular to the face of the ski. Get them as tight as you can so that it flattens out that buckle in the ptex and compresses the delamination back together tightly. Let it cure with the clamp on for a full 24 hours.
After it has cured, take of the clamps, peel away the plastic wrap, and sand off the excess epoxy that was squeezed out. This is why you want to use the minimum amount of epoxy, but not too little. You are going to want to round over the sharp edges with a file to minimize the tips catching on stuff.
Now is when you want to install rivets. Use stainless steel rivets and make sure you get the size that suits the thickness of the ski at the repair. Make sure to use the proper sized drill bit as well to make the hole. I'd use 2 or 3 rivets about 1/2" to 3/4" from the edge spaced about 1.5" apart. Coat the hole with some epoxy to keep it sealed and have the flat side of the rivet facing down (insert the rivet from the ptex side). It's pretty hard to fuck up with a rivet gun, but play with it little bit before installing them so you understand how it works. You can flatten down the squished side of the rivet if you would like with a hammer, but make sure you are doing it on a hard surface with the opposite side of the rivet directly on the hard surface.
Boom, ski is "fixed" until you inevitably do it again but it will go smoother the second time around.
Summary of tools:
Sandpaper
file
Alcohol
Epoxy
C Clamps
2x4 scraps
plastic wrap
rivets
rivet gun