Bootfitting always seems to be one of the aspect's of skiing which causes people the most problems. If your boots dont fit it can not only ruin your day through discomfort but it could also be holding your skiing back.
Having worked as a bootfitter for over 10 years, I have learned quite a few things which could help you get better comfort and improved performance from your boots. In this series, I have 5 boot reviews coming up including the K2 Pinnacle 130, the new touring boots from Salomon and Atomic, the brand new Descendant boot from Full Tilt and something special to finish the series.
Along with reviewing the boots I wanted to give some general boot fitting advice so this first article is both a review of the new 2016 Rossignol Allspeed 120 but also general bootfitting advice which hopefully will help you when you come to buy new boots.
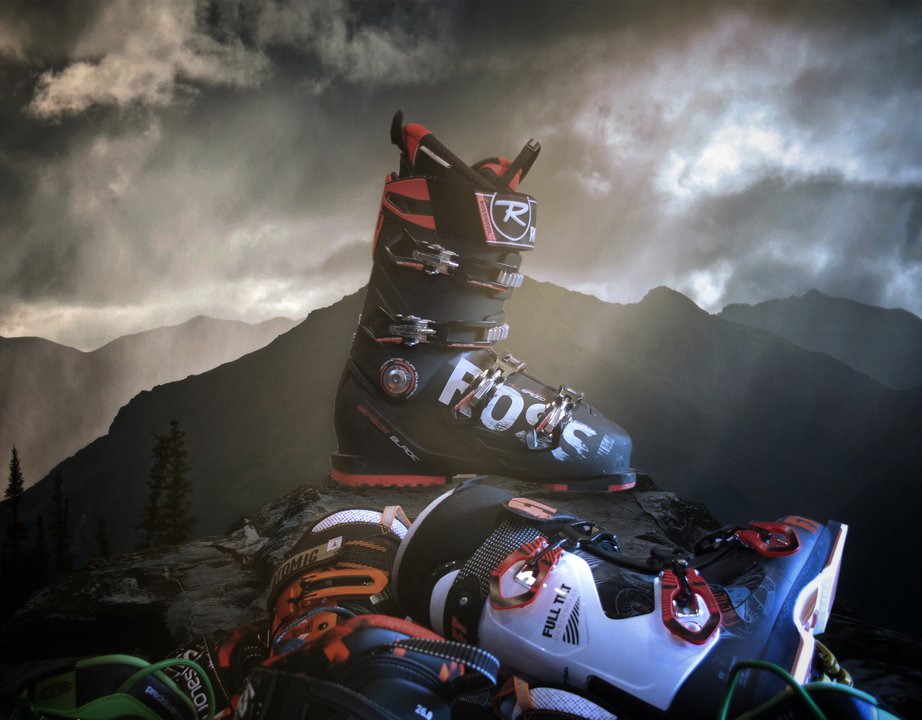
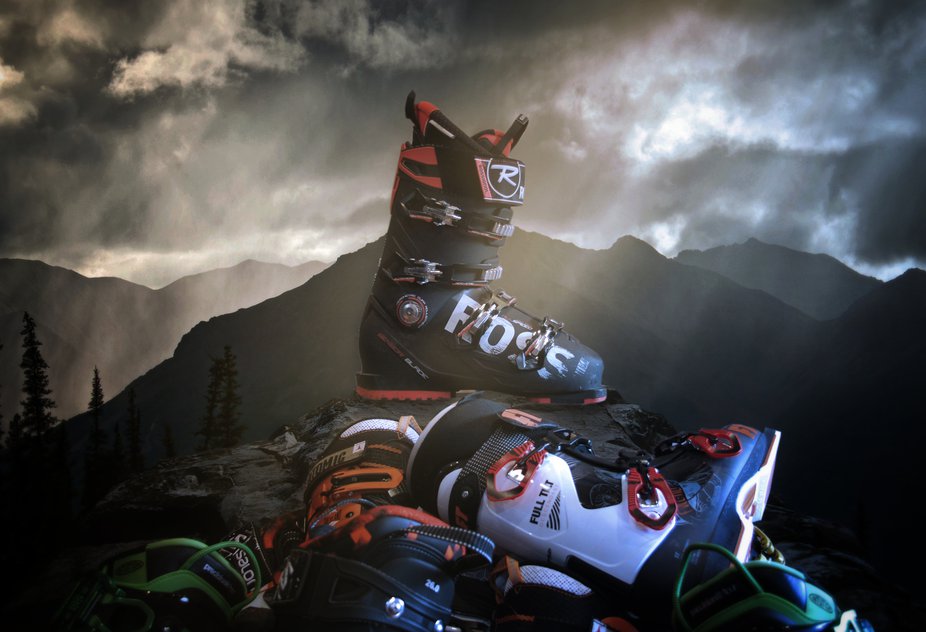
Rossignol AllSpeed 120 - The ultimate Park Boot?
One of the questions I see in the forums all the time regarding boots is "which park boot should I get?"
Although there are boots designed specifically for the park and in many cases they do an excellent job, there are any number of boots which, although not marketed towards park riders, will still do an outstanding job.
In this article I am going to show you firstly, what you really need from a boot to ride happily in the park and secondly how pretty much any boot can be slightly modified to make it the ultimate park boot.
Understanding Boot Fitting
Boots may seem confusing but break them down and they suddenly seem a lot simpler
The first thing I want to touch on is the idea that boots and fitting in particular are some kind of dark art.
While it can take some time to learn the methods and principles involved in fitting a boot, it does all come down to one thing; the interaction between the foot and the boot.
As humans we have evolved for our feet to work a certain way and up until recently enclosing the foot in a hard plastic boot and sliding down a snowy mountain was not something we would naturally do. This is not to say that you can't be comfortable doing it, you just have to consider how the body works.
Any time that you are fighting against the boot you will have discomfort. This could be your leg leaning in when the cuff of the boot angles out, your instep being too high for the boot, or probably most the common, the shell of the boot not matching the foot shape. Any time there is a mismatch between foot and boot, you will have problems, but if you can match the shape of the boot to your foot and ensure you are flexing in the same path, then hopefully you should be skiing in comfort.
The biggest factor in getting a good boot fit, in my opinion, is getting the foot back to neutral (or as close as possible), which is most often achieved by using a custom footbed.
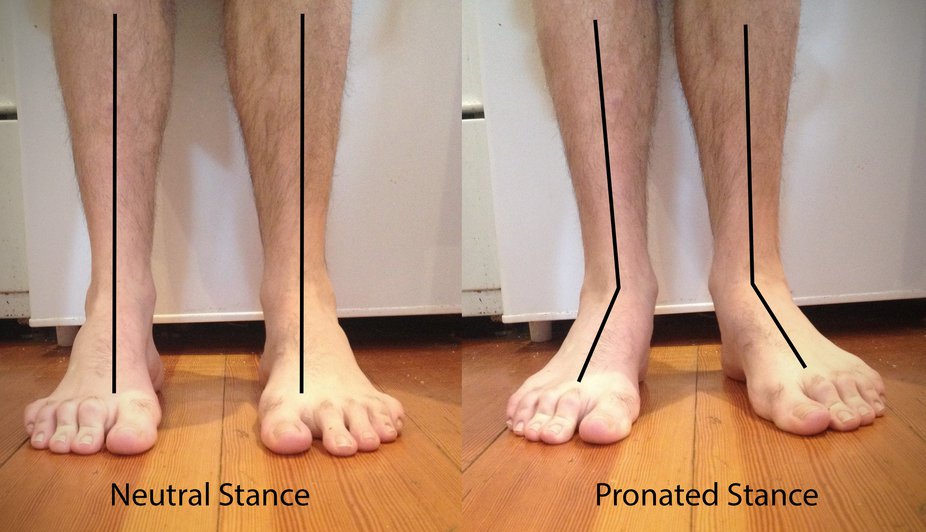
The vast majority of people pronate to some extent. This usually occurs because the medial arch (long arch on the inside of the foot) begins to collapse under load, making the foot appear to lean inwards.
When the foot drops, it turns the tibia and fibula leg bones slightly inwards, meaning when you flex your knee forward it will follow a path inside of the foot, not straight above it. In a ski boot this will mean that every time you flex forward, you will be fighting against the cuff which could cause a problem.
The other potential pitfall will be discomfort to the inner ankle and the side of the foot just behind the little toe. Inner ankle pressure is obvious from the photos above, as the ankle clearly sits in the furthest, meaning that it will hit the boot first.
The side of the foot by the little toe is a little harder to understand. You may think that with the foot leaning inwards, the outside would be fine, but you have to remember that the boot will not move. If the ankle leans onto the cuff, it will push back, so not only can the ankle hurt, but the outside of the foot can be pushed against the side of the boot.
So pronation is no good in ski boots and this is because, ski boots are produced in a neutral shape.
If you look at a boot from the front, the clog (foot part) and cuff will be almost directly above each other. The cuff may slightly angle outwards but in general it's fairly straight, up and down. So to get the best fit you need to ensure your foot and leg match this profile as well as possible.
The reason we use footbeds to re-align the foot and ankle back into a better position is to better match the boot. The foot will always pronate somewhat under load, but we can control this by stabilizing the footbed correctly, which allows the fitter to know how much movement you will have in the boot and therefor how much space you will require.
Once the foot is as close to neutral as possible it is usually a fairly easy task to adjust the shell and make the boot match the shape of the foot - get the foot where it needs to be, adjust the shell and you should be good to go. One big factor that a lot of fitters forget though is to evaluate the foot in neutral.
If you are using a footbed to change the position and possibly shape of your foot, the fitter needs to take this into account. Usually when I'm fitting I will have the customer to firstly stand in their natural stance, this is so I can get an idea of there natural stability but I will also manipulate the feet to roughly position they will be in, once I make the footbeds. This allows me to get a better idea of the real shape of the foot im fitting.
This is also the reason I do both weighted (stood up) and un-weighted (sat) measurements for length. Often the weighted measurement can be as much as 10mm longer then the un-weighted which could be the difference of a whole size. I usually go closer to the un-weighted measurement then the weighted but the shell check (which I will come on to) is always the decided factor.
I get to test a lot of boots and in nearly every case the most I have to do to make a boot fit is add my footbeds and mold the liners. Occasionally I may modify the shell shape slightly, but really it can be very easy to get boots to fit well, it just all comes down to how the foot sits in the boot.
Anyway enough about feet; on to the park boots...
What makes a Park boot?
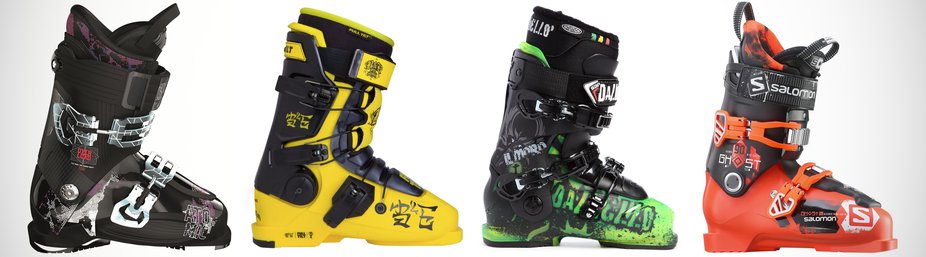
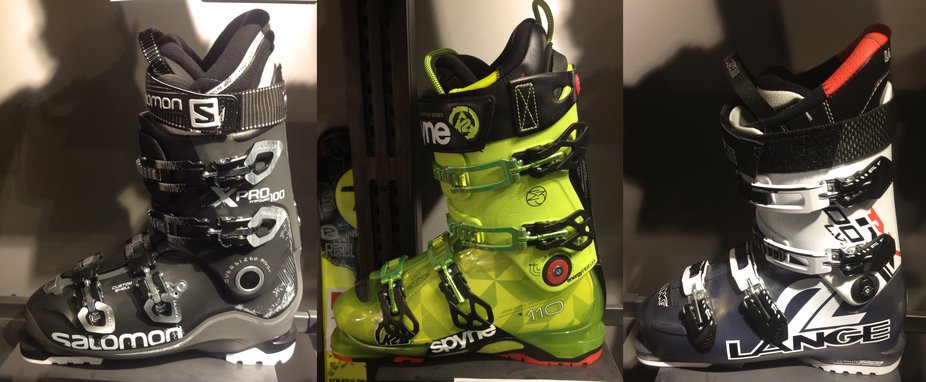
Ask people to name some park boots and this is probably what you will get
So what makes a 'park' boot different from the ones your dad may be wearing - the answer is honestly not a great deal. The main area park boots focus on is cushioning, they will usually feature softer boot boards to help reduce impacts and the liner may be modified slightly to add some more cushioning. But luckily those types of modifications are easy to do to conventional boots.
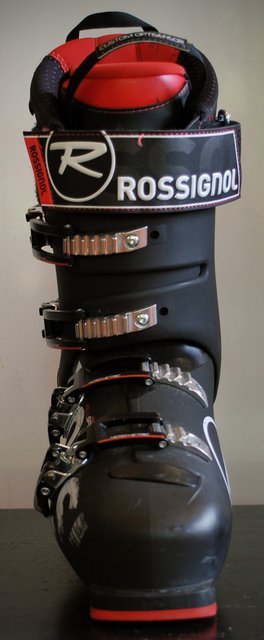
To demonstrate how a "standard" boot can easily work for the park I got my hands on a set of the new 2016 Rossignol AllSpeed Pro 120 boots.
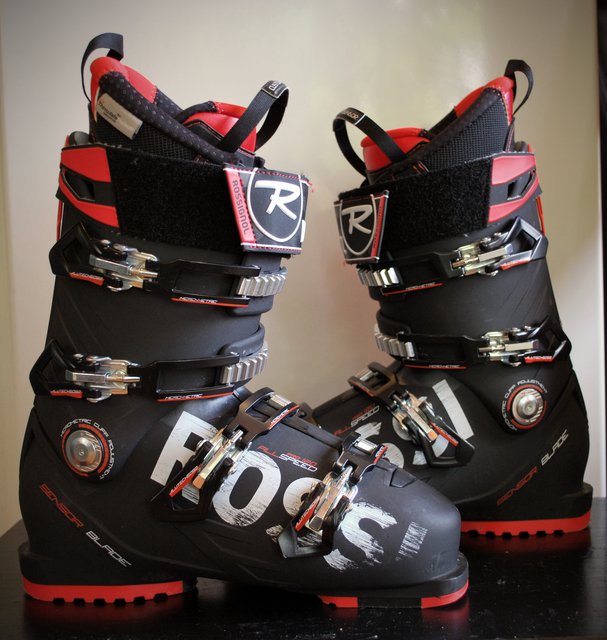
These boots are Rossingnol's new high performance model, but looking closer at them they actually have many of the features which could make them appealing to the average park rider.
Flex
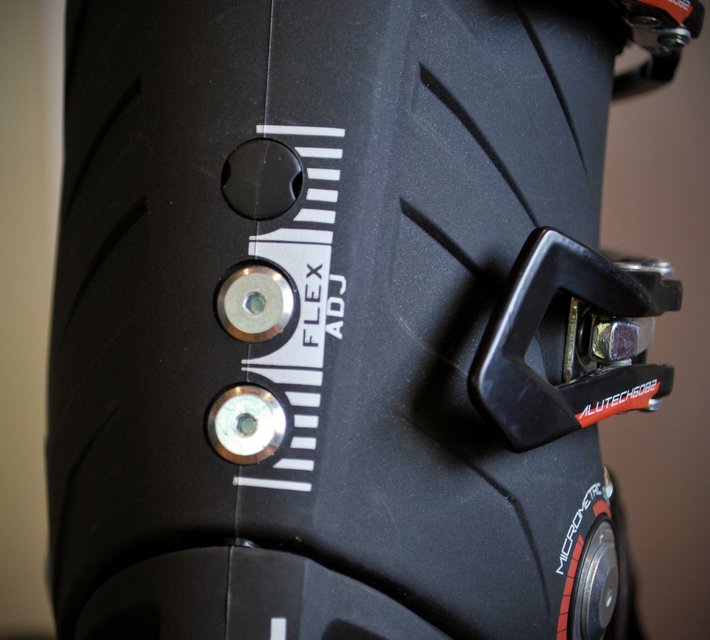
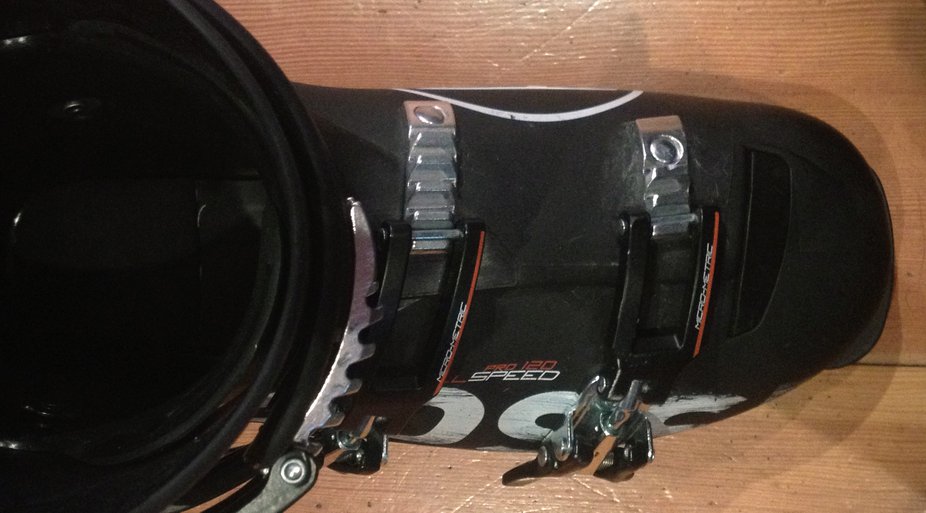
One thing people always seem to like with certain three piece boots is the ability to adjust the flex with different tongues. It is often forgotten that the same sort of flex adjustment can be done on overlap boots. Overlap boots often feature a number bolts which lock the lower clog to the cuff. By adding or removing these bolts the flex can be adjusted.
These perticular boots feature the possibility of up to three bolts in the cuff. With all three the flex will be 130, with two in (like I have it) it's 120, with one bolt it's 110 and with all three out they are 100 so a very good rnge from one boot.
Flex is one area where there is often quite a big misconception in what works best in the park. People often assume that a softer flex will be more comfortable, especially on the shins, which in some cases may be true, but I tend to find going slightly stiffer helps more.
A stiffer flex will allow you to drive into the boot harder, this may mean you're carving harder off a lip or popping harder onto a rail. One area I especially think it helps is switch landings. When you land switch, most of your weight will be (hopefully) on the tongue of the boot, so a stiffer flex can help your legs absorb the impact.
Overall, the correct flex for a rider will be decided by much more than where you ski, but don't fall into the trap of thinking you need soft boots to ride the park.
Impact Reduction
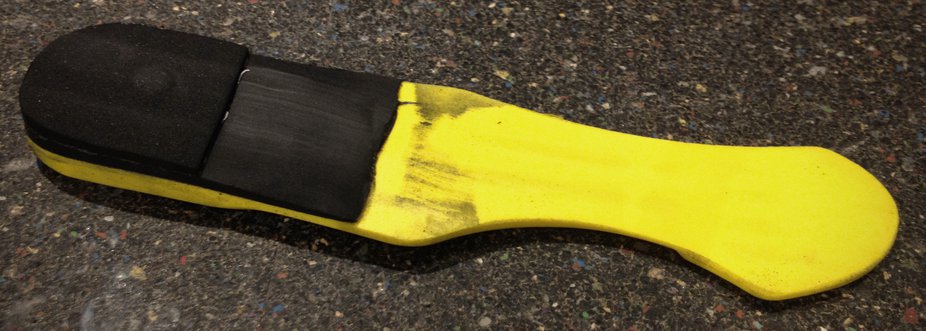
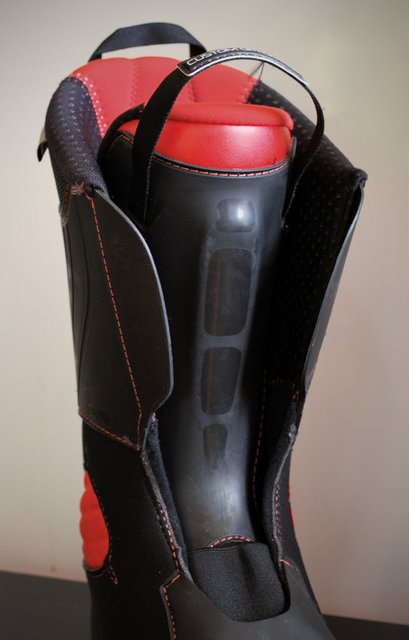
the yellow material is the original hard boot board.
As I mentioned above, one of the big selling points of park boots is the added cushioning and this is one area where the Rossi falls down. The boot board is a firm plastic, which offers no impact reduction and on my first time riding the boots I was noticing quite a large amount of pressure through my heels on landings.
Luckily though, the boot board is an area which can be modified quite easily. You may have seen in my setup article on Max Morello I modified his boot board and added a gel pad from a SPK boot. Well for these I did something even simpler.
The first time I rode the boots I noticed it seemed like there was a bit of a gap under my heel when I was skiing. It felt as though the ramp angle (angle of the boot board) was too flat and I wanted the heel to be slightly higher.
To help improve this I added a section of firm boot foam to the back part of the boot board, then ground it so it had a natural transition heel to toe leaving the heel slightly higher. On top of this I added a section of soft foam to act as a shock absorber. I did not make the full lift from the soft foam as I still wanted a firm feel when carving, but the soft foam on top added some nice cushioning.
This simple modification has made a world of difference to the comfort. Impacts are less serve and the boots are on par with many park boots I have worn when it comes to shock absorption.
You may wonder why I only worked on the heel and the simple answer is, I find the most impact goes through the heel. I am currently testing boots with full shock absorbing boot boards and with this heel modification I find these boots are pretty equal in shock reduction even though the toe is still hard.
This is a simple modification which any decent boot fitter should be able to do for you. If you came in to my shop and you weren't acting like a jerk it would cost you maybe $10, so don't be put off by boots just because they do not have a soft boot board.
Toe Problems
If you have ridden in the park for a while, you will no doubt have suffered toe bang at some point. The way we ski in the park means we very often land backseat which drives your toes into the front of the boot. If you have ever had a black toenail you will know just how much it sucks.
When it comes to relieving this problem a footbed is always a great place to start. It will help prevent you from sliding forward in the boot and will also stop the foot extending so much under impacts.
However, in these boots my footbeds were not enough and any time I was landing backseat my big toes were slamming into the end.
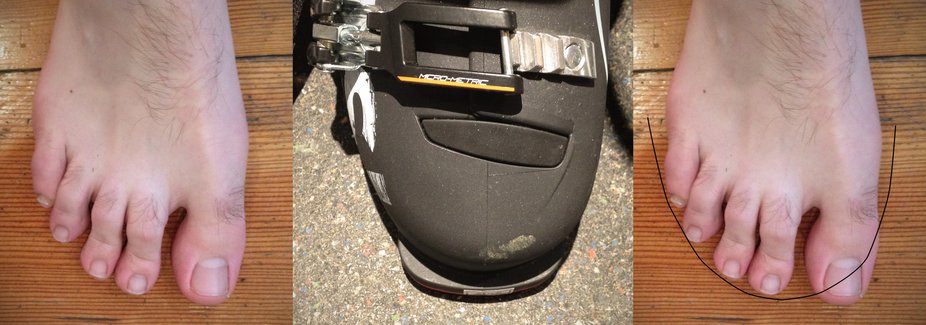
Looking at the boots and comparing them to my feet, it's fairly easy to see why.
Bootfitters would say my toes are square/angled. My first three toes are pretty much the same size and my big toe comes out straight from the foot, giving a square look to the first three toes. My fourth and fifth toes do angle off, so I don't have a fully square toe shape, but looking at the boots you can see they are much more rounded on the big toe side then my foot is.
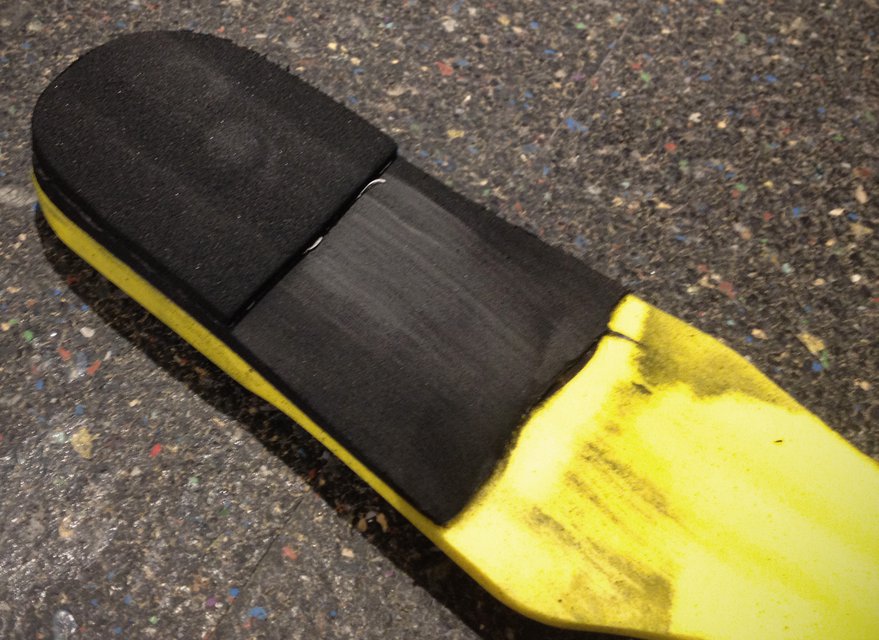
It was this mismatch in shape which was causing me problems, but luckily it was easy to fix. I was able to punch out the big toe area to make the boot better match my foot. This type of shell work is something a bootfitter should always be considering when fitting a boot and usually the work should be included in the purchase price.
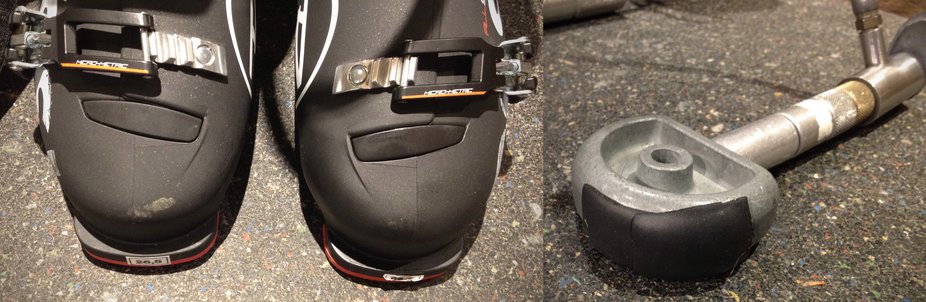
The boot on the right in the above pic has had the toe box modified using the stretcher in the far right pic.
This adaption to the big toe area is something that is often done on park boots as it is expected that the user will land back seat, whereas an all mountain boot like these will often feature a rounder toe shape as the user will generally be more forward but as I have shown this can easily be changed.
Shin Pain
After toes, shin bang is probably the most common issue in the park and it is something some park boots claim to solve, but if you read the forums, you will still find countless posts complaining of shin bang even with the best park boots.
Shin bang is usually more down to the fit of the boot or the way in which you are skiing. I would split it into two categories - the pain you feel on the shin when flexing the boot and the pain you feel in the leg on a heavy backseat landing. They are usually different things, but people tend to confuse them.
The pain when landing heavily backseat is harder to fix, as it is bad technique mainly. Getting a good fit in the cuff will prevent you from leaning too far back and also getting a good height cuff for adequate support will help, but trying to land over your feet will help the most.
The pain in the shin when leaning forward is more usually a symptom of a boot which is too big or too high volume. Remember a boot can be the correct size, but still be too big in volume, so don't presume a boot is not too big just because the length is correct.
Ways to help eliminate shin pain include ensuring that you have a snug fit over the instep and checking the foot is again kept as close to neutral as possible.
Having the instep of the boot close to the foot will mean there is a good interaction between the shin and the cuff. If there is a gap over the instep you can end up leaning on the edge of the cuff, causing a pain in the lower shin.
If the foot is allowed to pronate in the boot, the leg bones will rotate slightly inwards. This slight rotation every time you flex forward can irritate the shin and can cause quite bad pain.
For me to get the shins comfortable in these boots, it was as simply a case of adding my footbeds and ensuring my heel sat high enough to give a good instep fit. Throughout all my testing I have had no shin issues in these boots and they have been a lot more comfortable than some boots I have been testing.
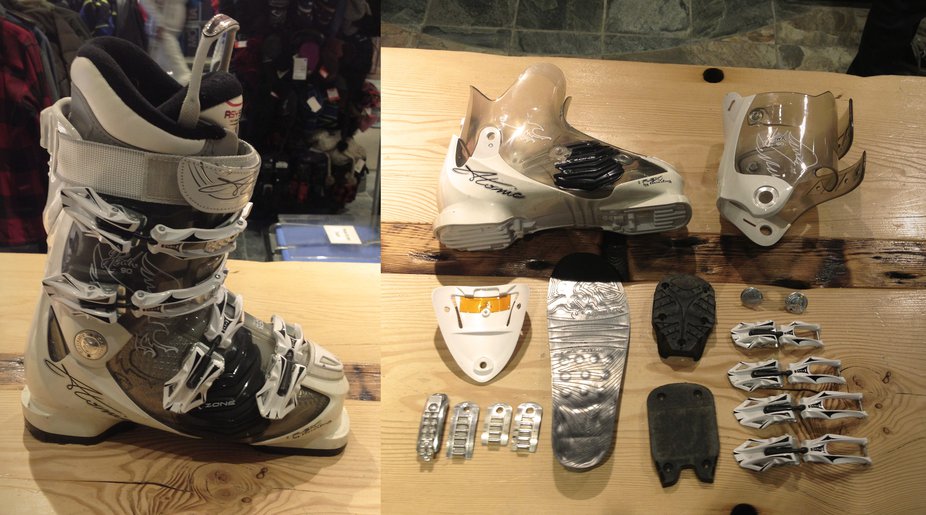
Shell Shape
One thing I have not touched on is shell shape and width which is tradionaly the main thing people discuss when comparing boots.
Traditionally boots would come in one last (forefoot width) and volume, but this is beginning to change. These Rossi Boots for example come in three widths - 98mm, 100mm (which I am testing) and 102mm - so it should be relatively easy to find the correct fit, regardless of whether you have a narrow or wide fit.
Quite a few brands are doing this now and personally I think it's a good thing. Having a wide foot myself, it was always annoying having the majority of high performance boots not work for me as they were too narrow.
At the time of writing I am testing three boots, all of which all claim to be a 100mm last, out on the hill however, they all fit completely differently. So although knowing in theory what width boot will work best for you is great, it is still very important to get a shell check done and try the boots on before buying anything.
Shell Checking
How you want the shell to fit will depend somewhat on the type of fit you are after but there are a few general guides you can use.
For the length its fairly easy to check the shell. Put your foot in the shell without the liner and then slowly slide your foot forward. When you feel your toes lightly touching the end keep your foot in that position. Reach down and feel how much space is behind your heel, typically 1 of your fingers will be about 1cm wide and for most skiers I look for around 2 fingers space, or about 2cm, behind the heel. Some do like a tighter fit and go for as little as one finger's room but for the park a little toe room is never a bad thing.
The next part you can check is the forefoot. Slide your foot slightly back in the shell so your toes are off the front but not so far that your heel is in the back. With your foot central in the shell you want around 5mm either side of your forefoot. To make this easier to check you can slide your foot to the inside and check you can get about 1 finger down the outside.
Once you know how the forefoot fits check the instep. As strange as it sounds the instep and forefoot work together. If you stretch the width of the shell the instep will drop slightly, so knowing how much room you have to work with can be helpful if you think you need more width. If the forefoot shape feels good then you want around 15mm space over the instep, a finger with a bit of wiggle room. The instep height can be adjusted in a number of ways but thinking how it affects other parts of the boot is important.
The last checks you can do are the ankle and heel. With your foot central in the boot again you want to be able to fit roughly 1 finger either side of your ankle bones. Hopefully you have your footbeds already as its good to do this check with the footbeds as it will effect where your foot sits. If the ankle is good reach further down and make sure there is about 5mm space either side of your heel.
These shell checks are really the only way to asses how a boot will fit and also what will need to be modified to make them fit well. A shell check which is not perfect straight away does not mean the boot wont work with some modifications but in general it is good to find a boot which roughly matches the foot.
Hopefully that gives you some idea of what you are looking for and with my modifications made, all that was left for me to do was hit the park to see how the boots performed.
How do they Ski?
My first few laps in any new boot are always a case of trying to get the buckle tightness correct and these Rossi's were no different. I usually leave the foot pretty loose, but I like more support in the cuff but hopefully without a restrictive feeling in the calf. The cuff of these boots works quite well for me and I'm finding so long as I have a reasonable tightness on the top buckle I can have the second down a little looser. The wide powerstrap also helps gives the top of the boot a good snug fit and only in the beginning was I finding any real discomfort due to tightness.
Having a cuff which supports you well but without cutting off blood flow is really important. If you need to tighten your boots excessivly to either make them feel secure on the leg or two make them feel stiff enough you may want to consider getting some fitting doing.
Ideally you should have good support from the cuff but be able to fit two fingers side by side behind your calf when you lean forward. Try to find this kind of fit and you will have good circulation all day.
Having the conventional four buckle design with a power strap did make things overall pretty easy to dial in the fit, although I don't see the need for a toe buckle to be honest.
Once I had the fit dialed in I did a few warm-up laps to see how my modifications were working. I could tell instantly that raising the ramp angle and adding the soft foam had worked perfectly for reducing impacts. Along with getting a better impact reduction I was finding I got better heel hold, partly becuase I sat better in the heel pocket but also because I had a more snug fit over the instep.
Heel hold can be hard but I have found ensuring the heel pocket is wide enough is very important. Too narrow and even with the best impact protection you can hurt the side of the heel on heavy landings.
On backseat landings my left foot was feeling great in the toe box on the left boot but the right was still a little tight and did require some more adjustment.
The toe box has been the hardest part to get right over my time testing. Although it is possible to alter the shell there are limits and I found I was not able to push it quite as far as I needed. They work well nearly all the time but on big backseat landings my toes will be sore.
Part of the issue is the liner though. People often get a boot stretched loads but are then surprised it does not feel much bigger and the reason is the liner. Although liners are soft they wont stretch a great amount or they would offer no support. Its important to consider if you may also need the liner adjusting along with the shell.
I found the toe box of the liner matches the shell quite closely so again was not working for me. I was able to improve it by cutting a few of the seems to give a more relaxed fit but overall if I was buying boots I would perhaps look for a boot with a toe box which better suited my foot.
The flex was something I expected to play with a little to find what I liked best, but I found the standard 120 setting has been great for nearly everything. I'm finding that the flex never really feels overpowering in the park, but I am still able to push the boots hard. I often find boots aimed soley at the park tend to be a little forgiving and often too soft.
Personally I prefer a more conventional, stiffer flex as I find a good fit offers more comfort to me then a softer overall boot. I'm also getting a bit older and I do like the added support a slightly stiffer boot offers. I was able to rest into the cuff and take some weight off the legs without worrying I would overflex the boots, having the ability to rest slightly in boots I find very useful especially on longer runs.
One thing I do like in boots is lateral (side to side) stiffness, a boot should feel stiff side to side, so when you're carving you can really push into the boot. However, in many boots however I find the forward flex feels stiffer then the lateral flex. If anything I would say these are the opposite, they feel incredibly powerful side to side, while still giving a fairly forgiving forward flex, all of which means they work really well both in and out of the park.
Something I often overlook is how easy the boots are to get on and off but the first time I put the boots on I noticed just how little effort it required. There is a section of softer plastic over the instep which allows the boot to open more easily but I have found it has other benefits too.
Being slightly softer I do find I can get a better fit over the instep then a lot of boots. The plastic can give a little to give a comfortable fit but the firmer plastic around the sides still offers all the support you will need.
Another thing I found it offered was a little unexpected. Being slightly softer it gave the end of the forward flex a less harsh feel. On some boots with a very firm shell you may find the end of the flex is very harsh as the cuff hits the cuff, on these boots that hard hit was less intense partly to do with the softer plastic on the instep.
So allthough unexpected the boots being easy to get on may also may them more desirable for park riders.
One thing I did slightly differently for this test was to not mold the liners. People often say if you don't mold them, they will bed in just the same and last longer. To test this I skied them out of the box and really they have been ok but no great. They have taken some time but they are bedded in but I would not do it again. Molding really does do more then just skiing. If you use toecaps you can really push the heel back into the liner giving potentially more room in the toes and a tighter heel fit.
If you get a boot with a heat mold liner, get it molded it really is worth it.
Overall I have been very happy with the Allspeeds. The cuff offers a very supportive yet forgiving flex which is perfect for the park. The shell shape is tighter then I would normally go for although I have found it has held me so well I can usually ski without the foot buckles, buckled which has been nice.
A big factor in these boots favor is the large amount of possible fit and flex options. Most people should be able to find an option which works for them and with a little modification you will have a boot which will work perfectly not just in the park but all over the mountain.
The biggest issue has been the toes and really this is not a fault of the boot but more simply a case that I don't fit perfectly. But I have never found any occasions where I have been wanting more cushioning or any of the other features offered by "Park Boots".
Just a few of the other boots which could work just as well as these Rossi's in the park.
With any ski boot, fit is the biggest factor, so having more options will always be good so next time you head to a boot fitter, take a second look at the boots you may have dismissed in the past.
Coming up next in the series is a full review of the 2016 K2 Pinnacle 130. Boasting Tech inserts in a DIN compatible sole, it has the potential to be a true go anywhere, ski anything boot but how will a boot from a relatively new boot manufacturer stand up against the brands who have been doing it for years?
Review System
You may have read all that and completely disagree with what I have said and if that is the case, you can tell me. All the products we test are added to the review system and you can add your own reviews and comments. Disagree with a review? Write your own. The more people adding reviews, the better the whole system works, so get involved.
To get you started check out the reviews for the outerwear and the goggles I used in this article:
If you want to stay up to date with what i"m testing and maybe suggest products you would like to see tested, follow me on Instagram @Tompietrowski
Comments