It looks like you are using an ad blocker. That's okay. Who doesn't? But without advertising revenue, we can't keep making this site awesome. Click the link below for instructions on disabling adblock.
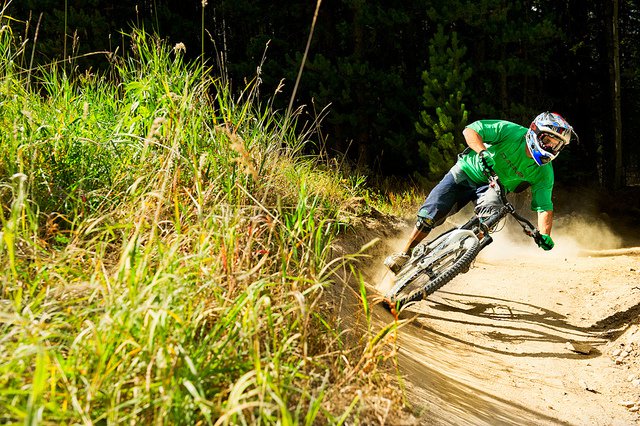
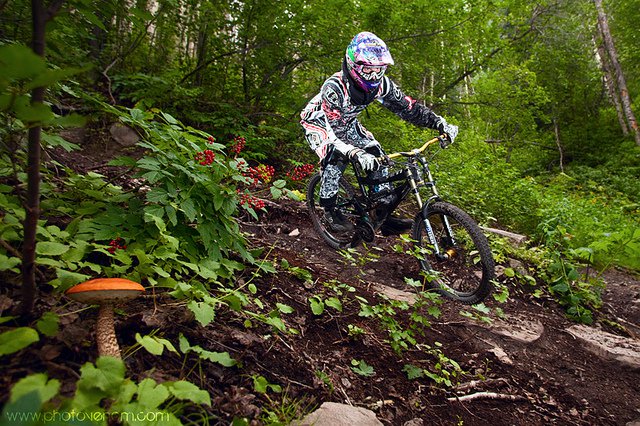
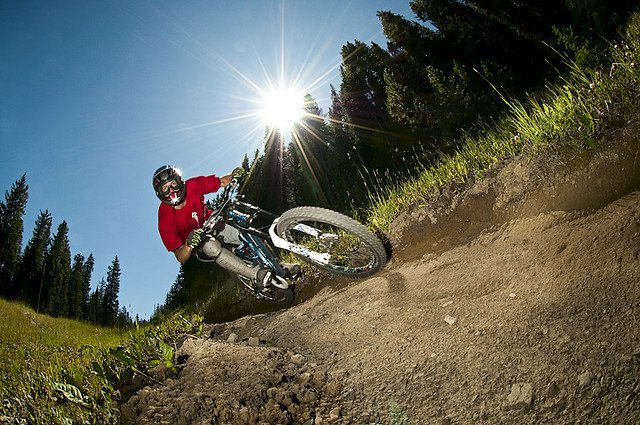
Lighting and composition are the key components of any great shot. This article discusses how to get the best of both to nail an awesome berm shot. This is the 2nd part in our three part berm series. You can read the first part here.Now that you have a great location, it's time to figure out what angle and lens will work best. We like to do this before setting up any flashes because then we will know exactly where to put the flashes to get the best possible lighting, without having them in the shot.Scouting around and testing different lenses is a great way to learn how to pick the best angle. By physically taking a shot from each angle you can use your LCD to review and find out which one looks the best. It also helps to have the athlete stand in the position that they will likely be in on the berm to get a solid feel for the final composition.Depending on where you are shooting there will often be objects of interest that can add depth to the shot. Try to compose around these as foreground or background objects depending on what they are and where they lay. To get the best possible background, make a wise lens choice. If the background is just dark trees, you may be best off zoomed in with a telephoto. If the trees are well-lit, or you are using a flash, a wider lens up close can create a better shot. Assess every location because there is no single method that will work perfectly. This comes with practice and experimentation. Now that you have a location and angle, it's time to figure out the best composition. This is something that you may change again and again until the athlete is ready to drop in. There is no perfect composition, just what looks best. But here are a few basic tricks that make a lot of difference.-The rule of thirds: Compose so that the athlete is 1/3 of the way into a frame from either side and/or top/bottom. Images with centered action look less interesting.-Framing: Using tree branches or an interesting foreground element to help frame the image can make any image more intriguing.-Athlete comes into frame: By composing this way the viewer will see where the action is headed. When action is leaving a frame it loses some interest right from the start.-Head-on: Shots taken from head-on or a slight angle off are often the best because this shows expression. Behind shots are great too but typically are less exciting and are best used as a way to show off the scenery.-Compose so the whole image is in thirds, not just the athlete. This could mean trail in the bottom third, trees in the middle, and blue skies in the top third. Layering like this makes an image more interesting.Through all of this you'll need to think about lighting. It's sounds like a lot written out on paper, but when you get in the swing of things this will all come naturally. With natural light you'll need to find a solid shade area, or catch the shot when the athlete's face is in a patch of light. The other option is out in an open area, but this will cast a shadow from the helmet on the athlete's face, depending on what time of day it is. That brings us to one last point in this article: Time of Day. This goes with all types of photography. The most appealing and softest light occurs right around sunrise and sunset. For most of us, that means sunset is when we will shoot. This leaves a lot of open trails for the early risers!In the next article we cover lighting with one and multiple flashes!


Comments