It looks like you are using an ad blocker. That's okay. Who doesn't? But without advertising revenue, we can't keep making this site awesome. Click the link below for instructions on disabling adblock.
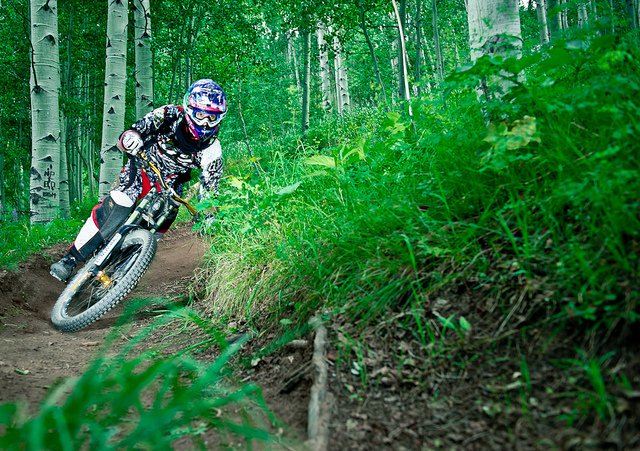
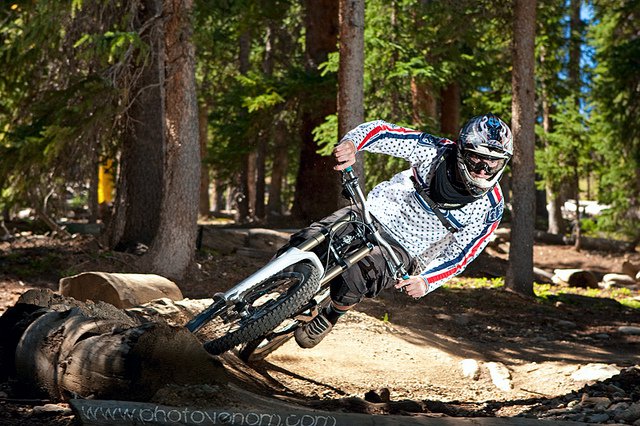
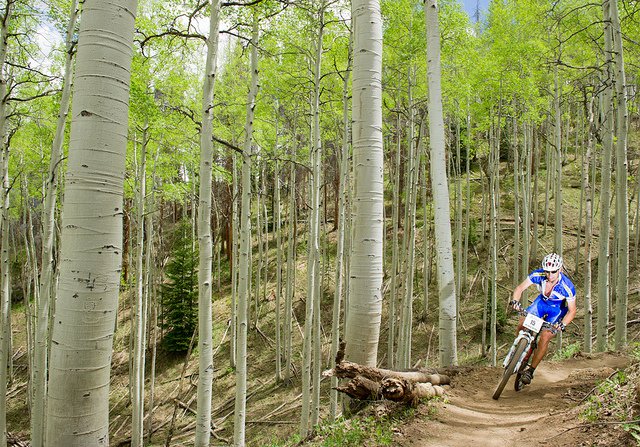
The berm shot may seem like one of the most simple mountain biking shots, but nailing it just right can take a lifetime. It's as tough to get a perfect berm shot, as it is to get the perfect powder shot. In this series, we will cover all the aspects of capturing amazing berm shots, starting off with location and athlete.When scouting for a good berm to shoot, there are several factors you'll need to keep in mind. First, how deep is the berm? The deeper berms are usually better, but if they aren't well built then the rider won't be in the best possible position. Deep berms place the rider lower and add generally let them get more of a lean into the corner. This makes for more dynamic shots.Second, which way is the berm facing relative to the sun? And is it in the full shade, partial shade, or full sun? If you are shooting without flash, then you typically want the sun to be slightly off to the side but somewhat head on. This puts light on the athlete. It also may work to place it behind the athlete if you are going for a silhouette shot, or are cranking up the aperture and ISO to get a well-lit sun start capture. If the athlete is in full shade and you don't have a flash, then try to avoid having any bright sunny spots in the background as this will draw the eye from the athlete. If it's in partial shade, choose a berm where the key shot places the athlete in a sun spot. These can be very unique. This is all things you'll want to consider if you are shooting with a flash as well.Third, what is the athlete wearing, and what do their glasses/goggle lenses look like? Bright clothing that doesn't blend in can make for a stronger image where the focus is on the athlete. For a more environmental shot, greens and browns will work, but you'll need to make sure the focus stays on the athlete, whether that means using a flash, or keeping them in the sun with a dark background. Eyewear is very important too since most people look straight to the eyes when they see a shot. Mirrored lenses can add that stealth element, but they may completely hide the athlete's expression. Clear lenses show the expression, but sometimes look out of place. Pick the right lenses for the location, or bring an extra set for the shot. Finally, Is there a good background for the berm? And is there a good foreground element to add depth to the image? The background shows the viewer location. Without a good background, the image could have been taken at any berm. If you are in a scenic place, try to compose to show off that scenery and you will create a far more compelling image. As for the foreground element, this is not a must, but adds depth to any shot. You can frame through tree branches, compose around an interesting log or rock, or show part of the next turn to add depth. This also helps to bring the viewer to the location and give them a real sense of what's going on.Now that you know how to get a great location to shoot, in the next part of the series we will cover how to work with the athlete, and light the image if you choose to use flash.Here's a summary of things to look for when you are shooting berms:- Think about the Angle of the Sun- Berm Depth and Speed- Sun, Shade, or Mix- Athletes Clothing and Lenses- Background- Foreground


Comments