It looks like you are using an ad blocker. That's okay. Who doesn't? But without advertising revenue, we can't keep making this site awesome. Click the link below for instructions on disabling adblock.
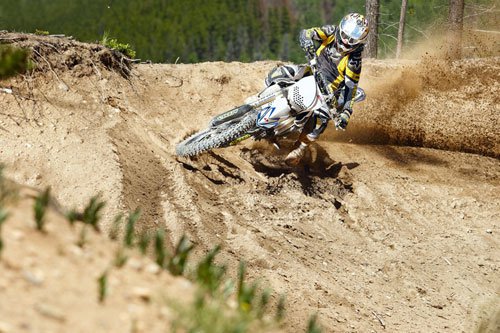
To take your editing skills to the next level, you need to learn how to make local adjustments. There are many reasons why you may want do use local adjustments, but before we give you reasons we will have to explain what local adjustments are. As you can figure it out from the title, they are adjustments applied to specific areas of the image, rather than global adjustments that effect the whole image.Local adjustments come handy in situations where you want to bring an emphasis to specific parts of the photo. For example, when you want to focus more attention on your athlete. Shooting outdoors often exceeds the dynamic range of your camera, and in these situations you can use local adjustments to brighten the shadows or darken the highlights.. or both. Sharpening could also be used as a local adjustment when you want to make your athlete stand out even more, without over-sharpening the whole image. A similar effect can be applied when you want to bring out a lot of detail form the sky or clothing, but you don't want your shot to look overdone. Or may be you want to change the color of someone’s jacket, then you need to apply local adjustment to the jacket itself. You can always apply any of these adjustments to the whole image, but you will either ruin the rest of the image or it is going to look ridiculously over-done. Local adjustments are really important, and can easily change the overall look and feel of your photos for the better.Many of the most popular photo editing programs have added local adjustments in their latest versions. Now you don't have to be a Photoshop guru to apply these. Adobe Lightroom and Camera Raw now have the Adjustment Brush and the Gradient Tool, Capture One has a whole Local Adjustments tab, as do most popular photo editing programs. Of course, since the beginning of time Photoshop has had Layers and Masks that allow you to apply local adjustments.The next time you start editing your photo, try to focus on specific areas of the image and apply local adjustments rather than global. After you get the hang of it, we can guarantee you there is no going back. Just like the example above, try to fix problems in specific areas. Use the gradient tool in Lightroom to darken/recover the sky. Mess with the Adjustment Brush and apply more sharpening to your subject. You should be able to see the difference right away. Overusing the Clarity slider for example, makes the your images look really over-done. Try using the brush and apply it only to the clothing of your athletes to give them a nice 3D look without ruining the rest of the photo. We hope you get the point, and if you are not quite sure how to apply local adjustments, in the next article we are going to show in detail how to acomplish that!


Comments