It looks like you are using an ad blocker. That's okay. Who doesn't? But without advertising revenue, we can't keep making this site awesome. Click the link below for instructions on disabling adblock.
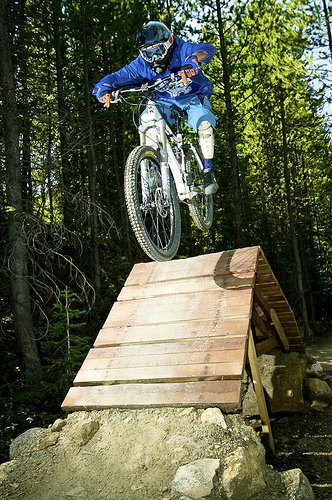
Do you still press your shutter button halfway down to achieve focus like they used to do in medieval times? Well, it's never too late to make a change for the better!Back-button Auto Focus works much faster than shutter button focus, and once you get used to it, will make a whole lot more sense. It's actually a really simple idea. Just move your Auto-Focus from the shutter button, to the back AF-ON button. This is done in the menu (settings for this are explained at the bottom of the post).So what's the point of separating the buttons? First off, it makes it easier to lock-in pre-focus. With action sports, often times you'll be shooting a feature where the athlete is going to be in the air. To get shots like this correct, it's best to pre-focus on a point that's the same distance as the athlete will be, lock the focus, and then re-compose the shot for the athlete. With traditional shutter button focus, you would have to press the button halfway down to focus in single mode, keep holding it down, re-compose, and hopefully not slip a bit and lose focus. Or you would have to flip the switch to manual after getting focus.With back-button AF, for pre-focus, you can still leave the camera in continuous focus mode! Simply aim the camera at the point you need to get pre-focus on, push the AF-ON button to gain focus, then release it to lock in the focus. See how much more simple that is? It only took 2 lines of text instead of 4 just to explain it!Since you can keep your AF on continuous drive mode all the time, you won't have to worry about changing the mode for a sequence. Just hold the button down through the whole series of shots and keep the rider in the focus point. It's really a HUGE advantage for shooting any types of sports!Using this mode, you'll never "accidentally" re-focus when you try to take a shot. You now have complete control over the focus! Like all new techniques, don't jump to this while on an important shoot. Practice for a while first before using this method on-location and make sure you get used to it. It takes time before you start remembering that you need to hit the button, so you'll occasionally miss focus completely because you won't think to hit AF-ON. But soon enough it will become second-nature and you won't be able to focus without it!We have swapped over to this method exclusively and it really is much easier and faster, and works especially well for all the different focus curveballs action photography throws. Instructions for setting up your back-button AF:For Nikon Users- Instructions provided by Simply Knot PhotographyStep 1: Go into your custom settings menu Step 2: Select A (autofocus) Step 3: Select A5 (AF Activation) Step 4: Choose AF-ON onlyFor Canon Users:Information provided by http://www.usa.canon.comBack-button AF is engaged by setting the appropriate Custom Function in your EOS camera. Remember, to use any Custom Function, your camera must first be in one of the “creative zone” exposure modes – P (Program auto exposure), Av (aperture-priority mode), Tv (shutter-priority mode), or M (manual exposure mode). Custom Functions are totally locked-out if you’re in the full-auto “green zone”, or a picture-icon setting like the Portrait mode or Landscape mode.The particular Custom Function number varies, depending on the EOS model in question. Also, certain models in the EOS Digital Rebel series don’t have this capability (such as the original 6 million pixel Digital Rebel camera). Be sure to check your camera manual for confirmation on the Custom Function number for Back-Button AF in your EOS model.


Comments