It looks like you are using an ad blocker. That's okay. Who doesn't? But without advertising revenue, we can't keep making this site awesome. Click the link below for instructions on disabling adblock.
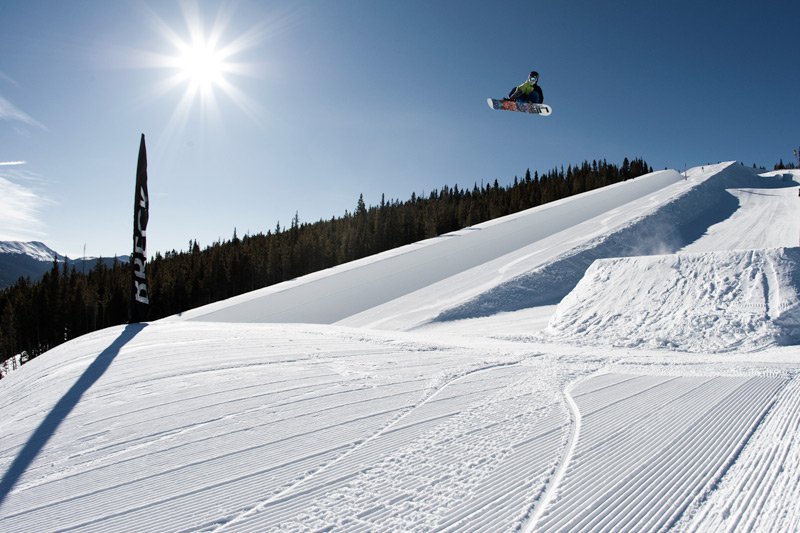
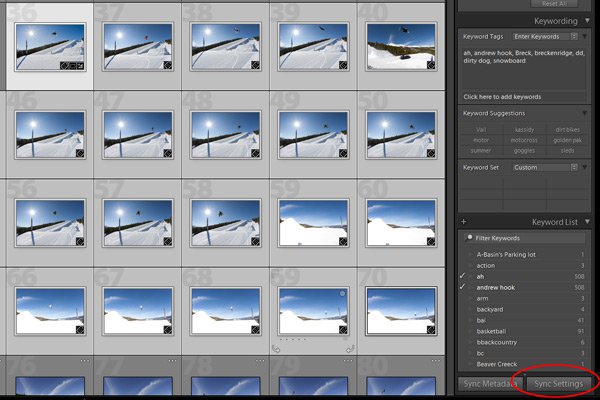
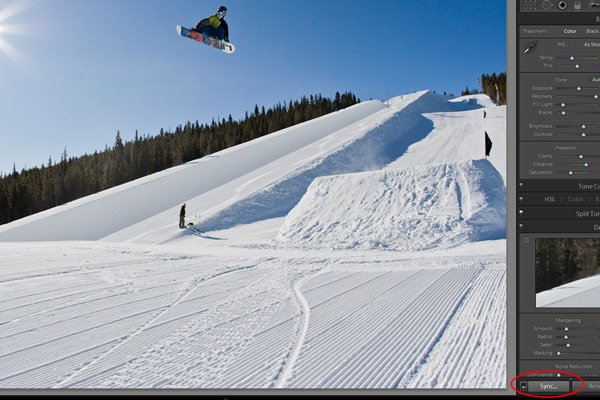
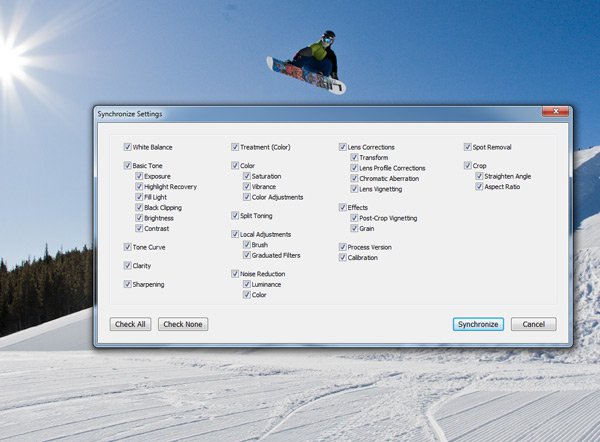
Shooting events is a vital part of almost every action sports photographer's routine.What you end up with after every event is anywhere form a couple hundered to a couple thousand images. From there on, some of us will need to upload the photos right away (when shooting for immediate media needs), while others may need to show them to a client so they can choose the best one. Either way we need to sort through a huge pile of photos, apply some adjustments (especially if you are shooting RAW) and get the images to our client.Lightroom is a great tool for these scenarios, and we are going to show you how to do it quickly by adjusting only a few photos and then synchronizing all the settings into the rest of the images.If the photos were taken under different lighting conditions, then you'll want to sort them in to a few different groups. Let's say one shot was taken mid-day and another one was taken late in the evening. If you apply the same setting to both images, chances are that one of them won't look good. This is just because the color of the light is different at different times of the day. So take a few minutes initially and divide the photos by similar exposure and lighting. Once you've created these groupings through flagging, color labels, star labels, or folder labels, your ready to start the mass editing! Choose one of the images that you want to edit, and apply all adjustments that you would like to make it look great. After this you have two options for syncing the adjustments to the rest of the group:You can either go to the Library Module, select the images you want by using Ctrl/Cmd and then click on the Sync Settings button in the bottom right corner or..You can stay in the Develop Module and use the film strop on the bottom to Shift or CMD + Click the images you like to select. Then the Previous button with turn in to a Sync button.The Synchronization window will pop up on the screen, and this is where you get to choose exactly which adjustments you want to sync.Selecting all of the settings won't work well if you've cropped, or performed local adjustments. If you haven't done any local adjustments, then go ahead and select all. To stay on the safe side make sure to un-check all local adjustments, ND's, and spot removals.Now there is only one thing left, clicking the synchronize button! All of your selected images should now look great! Make sure you select the adjusted image first and then select all the images that you want to look the same. Then repeat the whole process for the rest of the groups, and you are ready to export your files or upload to an online gallery. This is a quick, easy, and really efficient way to edit huge amounts of photos, and once you get to used to it we won't have to convince you any more!


Comments