It looks like you are using an ad blocker. That's okay. Who doesn't? But without advertising revenue, we can't keep making this site awesome. Click the link below for instructions on disabling adblock.
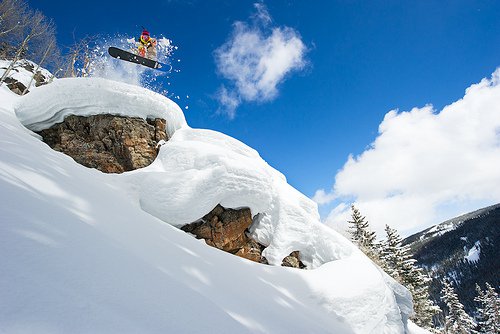
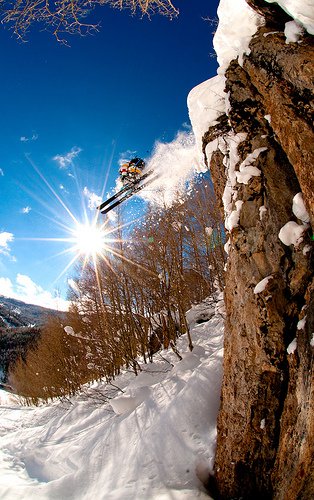
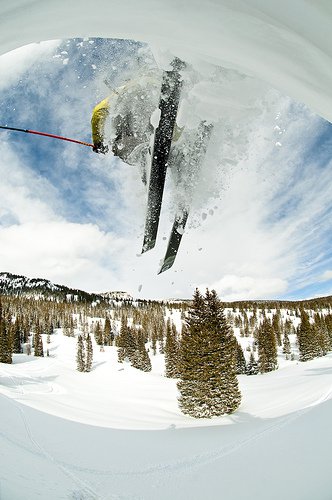
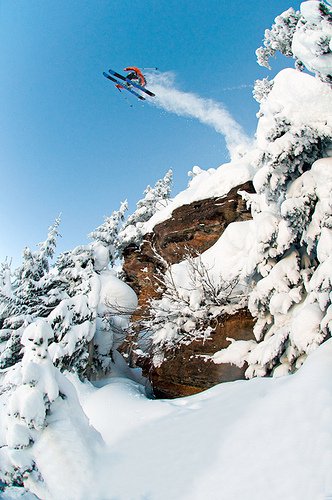
Of all the different places to shoot skiing and snowboarding, cliffs are probably the most fun and most difficult to shoot. It takes confidence with your gear, great athletic ability, and great athletes to capture a solid cliff image. Here are some tips to get you on your way.WARNING: SNOWBOARDING AND SKIING PHOTOGRAPHY IS NOT FOR EVERYONE. IF YOU ARE NOT AN EXPERT SKIER AND DON'T HAVE GOOD KNOWLEDGE OF SAFETY IN SNOW THEN YOU SHOULD AVOID THIS TYPE OF PHOTOGRAPHY.#1: Scope the cliff before shooting. Some will have overhangs and may be great to shoot from inside with a fisheye, others will look best from far with a telephoto, and most look awesome from the side. Looking at the cliff from the top (since you are usually skiing down, not hiking up….) is vital to the shot. Generally it's best to get close to the edge (at your own risk!) and try to envision what the other angles look like.#2: Coordinate with the athlete. It's really tough to see what the landing is like and where the best angle will be for the shot from up top. This makes it so that the athlete may hit the feature in different direction than you want. Bring radios if you can, or develop a plan from above with the athlete. They need to know exactly where to jump. You don't want to be landed on….#3: Compose with the elements. Bring a tree into the shot for the viewer to see the size of the cliff. Shoot into the sun for a more dynamic shot. Compose with foreground elements to add detail. And above all else, showcase the environment, takeoff, and landing! Including these elements will TEL (Take-off, Environment, Landing) the whole story and let the viewer know what's really going on.#4: Set a fast shutter. Too slow and you'll have a somewhat blurred and not-crisp looking athlete. Makes for an amateur looking image…#5: Don't track up the shot! Once you have a plan for the capture, move around in a way that you won't put your own tracks in the image. This will ruin that pristine powder look.#6: ZIP UP YOUR PACK!! This is easy to forget, and since snow flys all around the skier/boarder, you'll want the pack zipped up or prepare to buy more gear. #7: Never camp under the cliff with a fisheye if there is a risk of a ton of snow falling onto your head. Happened to us once and almost knocked Connor out. Shot from this is below….#8: Wide angles can make anything look bigger. And to showcase how gnarly a cliff is, sometimes the wide angle is your best bet. #9: Think of your background when you compose. Try to envision where the skier/boarder will be in the air and compose to have sky or a contrasting background behind them. The worst thing you can do is shoot with a cluttered background that makes the athlete impossible to see.#10: Have your athletes wear bright clothing. Making them pop can make a huge difference in the photo.#11: Checkout the local forecast and look for great storms that will happen overnight, or all day the day before. Blue skies make better shots and gray skies can ruin them. New snow is key for the athletes so they don't break their legs landing….. Visit opensnow.com for an accurate report and predictions before heading out.Looking for more skiing/boarding photography tips/tutorials? Check out these articles below:10 Basic Tips for Successful Skiing and Snowboarding Photography 10 Tips for Shooting Night Skiing Photos Capturing Classic Powder Shots


Comments