It looks like you are using an ad blocker. That's okay. Who doesn't? But without advertising revenue, we can't keep making this site awesome. Click the link below for instructions on disabling adblock.
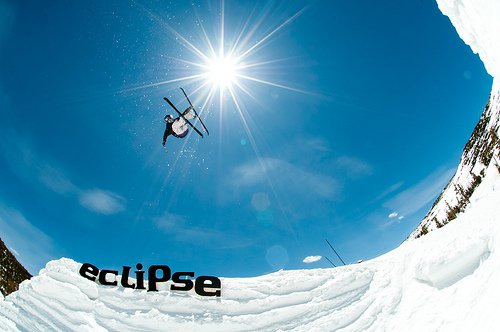
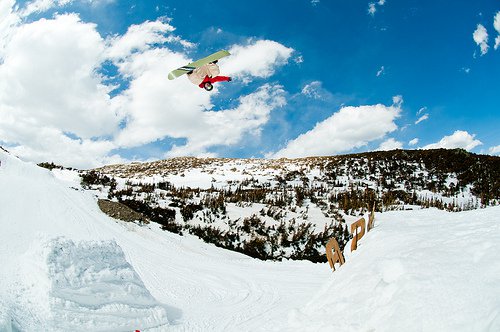
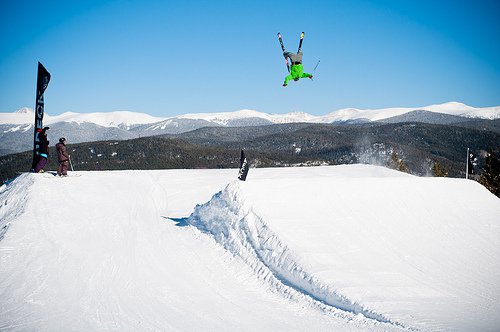
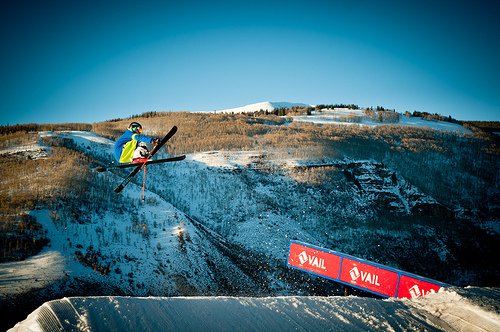
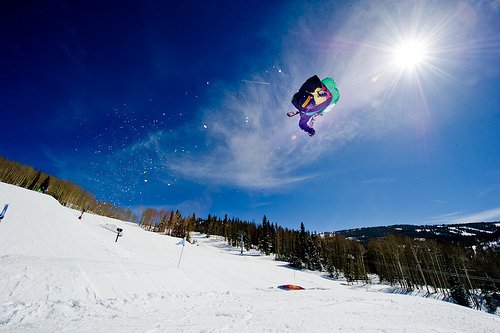
One of the most accesible places for learning to shoot snowboarding and skiing photography is the terrain park. It allows any photographer to capture great shots even if they don't have athletes to work with yet. On top of that, it will help you land athletes to shoot with for future shoots.Terrain parks are accessible to most ability levels of skiers/boarders from beginner to expert. They are also safer to shoot in than the backcountry because there is no risk of avalanche, and no sketchy lines that you would have to ski to get to the shot. The only risk here is bad athletes, or standing in bad locations…. Park jumps are great for learning this type of extreme photography. They allow you to take off your skis or board, walk around, and shoot 360 degrees with ease. This way you can really start to understand what angles work best relative to the sun. They also allows you to compose with the best possible background to really show off the resort and the athlete. The other advantage is that most resorts will have a constant stream of fairly talented athletes hitting the jumps so you can keep shooting for hours! Here are some tips/techniques that will help you nail the best shot.- Get in close and go wide. Going wide will help show just how big a jump is, and if it's really small, can make it look bigger! By being close the athlete will still retain a large part of the image.- Don't stand too close to the landing and centered. Athletes drift in the air depending on their angle of takeoff. If you get too close to the middle in the landing zone you might get landed on.- One angle that almost always works, is by standing at the edge of the landing (knuckle) and off to the side. This showcases the athletes more head on, and will capture the takeoff and landing of the jump with a wide lens.- Not finding any good shots by being wide and close? Go zoomed and far away. Shoot between tree branches way off to the side and above to frame the athlete and background. Shoot from the middle of the next or previous jump in the line to compress the jump and show takeoff through landing. Explore all options!- Try not to only shoot the first angle you like. If you have time, walk around with your lenses and take a quick snap from different angles. Some will look much better than others and you can review them all on your LCD!- For focusing, we like to use Back-Button AF. It works well to set your focus in auto or manual, and then lock it in by switching (or retaining) manual mode. This way it won't change when you start to shoot. Focus on any point that is similar to the distance the athlete will be away from you. Remember that they are going to be way up in the air so really think about how far they will be. Continuous AF can work as well, but only if you have a clear view of the athlete before they leave the ground, and don't mind moving the camera to retain focus (which may blow your composition). Continuous seems to work best with telephotos where you won't have to change composition as much to retain focus.- Shoot in continuous mode to get the shot at the right moment. Even a fraction of a second will make an athletes position look better or worse.- Composition wise, park jumps are like anything else. Generally try to keep the athlete off center, and not have your horizon right in the middle of the frame. This will make the shot look more dynamic. - "Guy in the Sky" shots went out in the 80's….. They may be fun to mess around with, but never look as great as a shot that TEL's (Takeoff-Environment-Landing) the full story… Showcase all three details or at least 1-2 and you will create a much more interesting and exciting image.- Shoot into the sun at f/16 to make a star. You'll need to compensate for the closed aperture with high ISO so you can retain shutter speed and have light on the athlete. Read this article to learn the starred out sun technique.- Always think about the background!!! An athlete in dark clothing against a dark background can be tough to spot. Shoot with a white backdrop (snow capped mountain) behind the athlete, or the sky. If they are in bright clothes, shoot them against trees across the valley. This is when you're telephoto can really help.- Keep that shutter speed up. To get that much air takes a lot of speed. You don't want a bunch of slightly-blurred images.- Talk to athletes that drop by while you're shooting. Making contacts will really further your photography. Try and get shoots with specific athletes and you can work with them to coordinate whatever trick will look best from the angle you want to shoot. Working with athletes will always have a higher success rate for shots.- If you want to break into shooting professional and amateur park events, checkout this article to get you started.- Add a flash into the shot. Make sure it's powered up pretty high, and keep the aperture low to get all the power you can from it. You'll need to shoot at 1/250th shutter since that's the sync speed most flashes allow, anything above that switches the camera to high speed sync mode and you won't have enough power to shoot in broad daylight when the lifts are running. Hypersync mode with pocketwizards will let you shoot higher shutter speeds. More on shooting flash in park in an upcoming article so stay tuned….The park is a great place for experimentation. Don't just post up in one spot all day like soo many other photographers do, move around, explore, and get creative! Once you are confident in your shots, bring out the flash and take it to the next level. This article is part of the snowboarding and skiing photography series on APS. Below are more articles in the series:10 Basic Tips for Successful Skiing and Snowboarding Photography 10 Tips for Shooting Night Skiing Photos Capturing Classic Powder Shots Shooting Cliffs: Snowboarding and Skiing Photography


Comments