Learn more sick photoshop techniques for your action images at Action Photo School
Everyone has seen amazing images with an unreal amount of detail, and wondered how it was done (No, it's not with black magic like you thought…) When we started we thought that we needed a $30 000 camera to get images like that, well not any more.
We are going to show you how to get the most out of your images using this technique that should become a part of your workflow. It is an advanced technique, so if you don’t get it the first time, go back and try it again until you have it mastered!
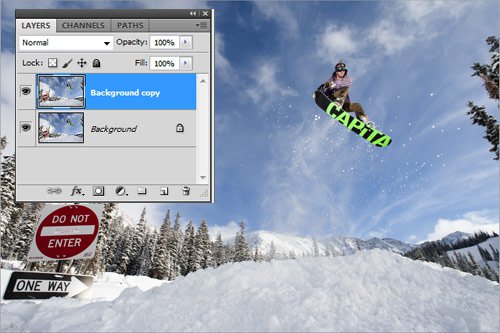
1.We are going to start by making a copy of the background layer by pressing Ctrl/Cmd + J or by dragging the layer to the new layer icon.
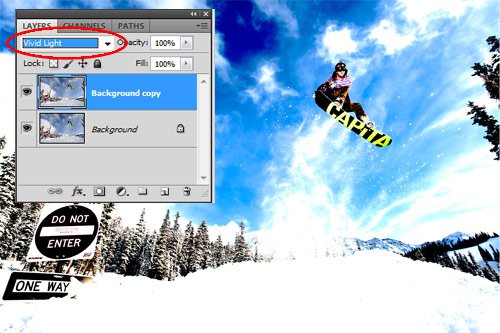
2.Then change the blending mode to “Vivid Light”
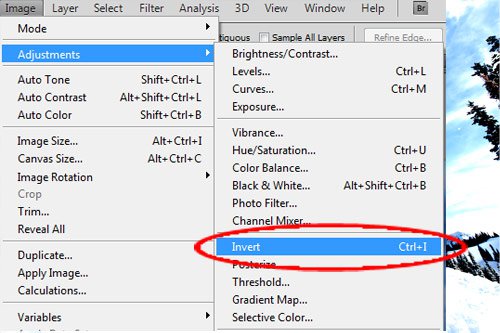
3.Now invert the layer by pressing Ctrl/Cmd + i or go to Image>>Adjustments>>Invert . You are going to get something that doesn’t make much sense at this point but don’t worry because it will all come together in a second.
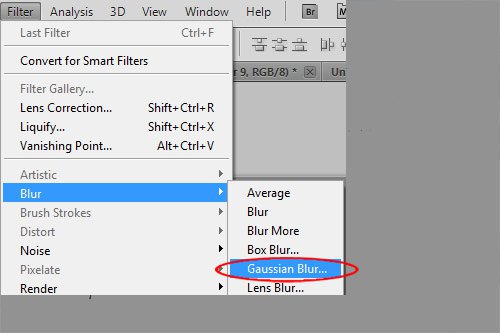
4.Go to Filters>> Blur>>Gaussian Blur. Increase the radius until you see nice outlines of your subject. If there is a halo around the edges of the subject you are “defining”, then you went too far and will have to back it up a notch or two. Radius will be different for different size images and it will also depend on how sharp your image already was. Now click OK.

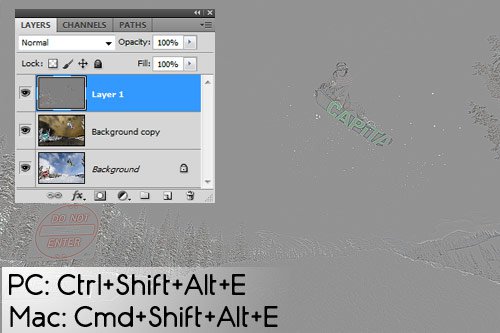
5. Press Ctrl/Cmd-Alt-Shift + E to merge the two layers together in to a new layer. Set the background copy to be invisible, and you are almost there.
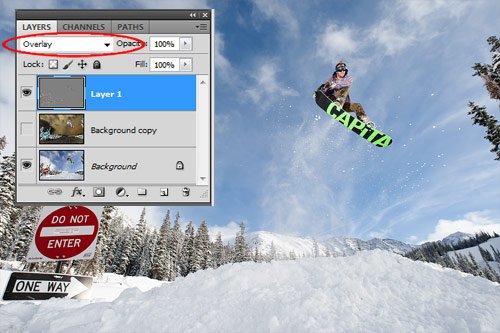
6. Now, set the new layer’s blending mode to either Overlay or Soft Light. If the effect is too strong you can always lower the opacity.
We would recommend applying this effect only to specific areas of the image by masking out the rest. Like all sharpening methods, it tends to bring a lot of noise in surfaces like sky, water, etc. This method works best on darker images because it outlines the shapes and makes the highlights really bright. This means that for darker images the subject will stand out better.
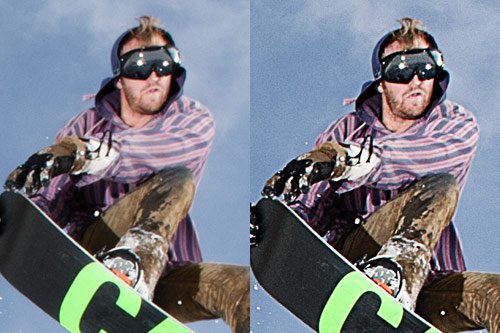
If you don’t like the effect, then you have either applied too much blur, or the image you are working on will not work well with this method. Try it on a different image if this is the case, and you will be amazed!


Comments