It looks like you are using an ad blocker. That's okay. Who doesn't? But without advertising revenue, we can't keep making this site awesome. Click the link below for instructions on disabling adblock.
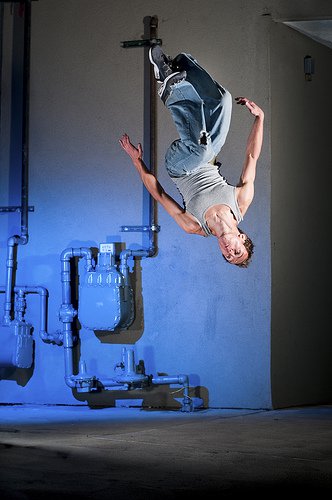
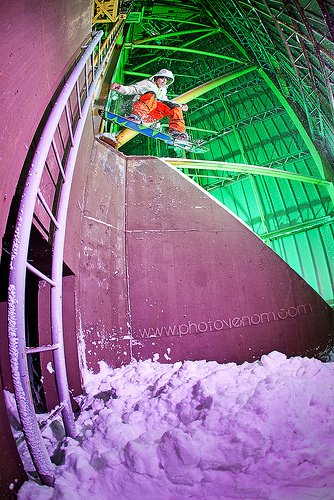
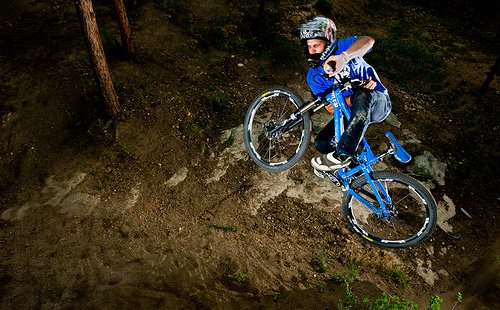
Since one off-camera flash will set your work apart from most action photographers, multiple flashes will put you light years ahead! It's technically tougher and involves carrying a far heavier pack, but the images will speak for themselves. Nikon SB-800 with LumiQuest Softbox III to soften light placed left and low, same configuration on right and about 6 ft. high. SB-600 on ground to left with LumiQuest FXtra blue gel. There is a whole different thinking when it comes to multiple flashes. Each flash will serve a different purpose rather than just fill. You'll still want a fill, but the second flash could be a backlight or rim light, a third flash could be the key light (accent from somewhat to the side and hotter) or maybe you'll want an effects light with a gel to bring some color to a certain part of the image. Whatever you choose to do with the flashes, know that each one will probably need a different setting.The problem that most photographers run into when they shoot multiple flashes, is that they tend to setup all the flashes at the same time. This makes for some pretty tough adjustments, and they generally don't understand what each flash's purpose is. Just because you have 20 flashes for a photo doesn't mean it will look good! You need to learn how to use and have a purpose for each one. Enter the "Build the light" approach.When you use the "build the light" method, you are doing exactly what it says, building the light! One flash at a time. Start with your fill light and take a quick capture to see how it looks. Brighten or lower it if you need and make sure you are happy with the results. From there, move on to the key light, or the rim light. Adjust accordingly and make sure you are set before you move to the next one. This way, you will see what each flash is doing, and can make sure each one is set perfectly. Have the athlete help you if the location is tough or you are far away. Show them the basic adjustments on the flash first and you'll save a lot of time. One Canon 580 EX II to the right and even with the athlete, One Canon 430EX to the left and even with the athlete. One Vivitar 285 with purple gel for front effect. One Alienbee with Green for rear effect lighting.Performing this action with most sports is straight forward, have the athlete stand where the shot will be and build the flashes around them. Shooting a large jump? Have the athlete stand in the middle and set the flashes up, then bring the power up slightly and aim them up to where the athlete will be in the air. With snow sports this is tougher since you can't have the athlete stand in the line (if it's powder) or they will ruin the snow. Instead, setup the whole shot next to the area you plan to shoot and get the settings right. Then maintain a similar placement and move the flashes over to the actual feature, knowing that your previous settings will work!With enough practice you will start to understand the flashes and can start setting up the shot without the athlete. It won't happen overnight though so don't get your hopes up. Till then keep using the "build the light" method.There are literally a million different combinations of flash for any single shot. Experimentation is important to find out which setups will be the best. Become one with your flashes. For more information on shooting flashes, check out the Strobist Website. One Nikon SB-900 to the left and high for a fill light. One SB-800 to the left and low aimed up at the athletes side for rim lighting. Triggered with PocketWizard Plus II's.


Comments