It looks like you are using an ad blocker. That's okay. Who doesn't? But without advertising revenue, we can't keep making this site awesome. Click the link below for instructions on disabling adblock.
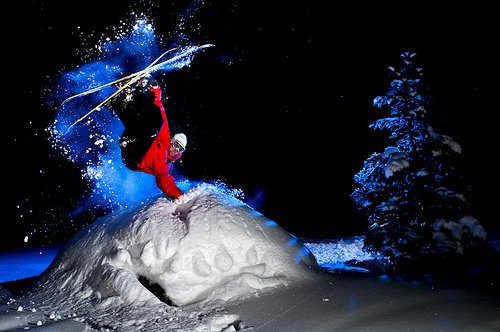
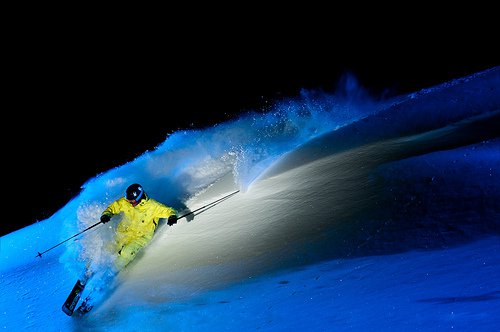
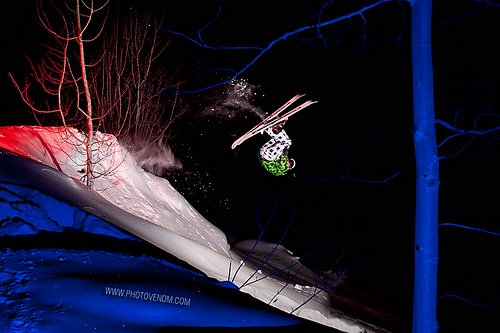
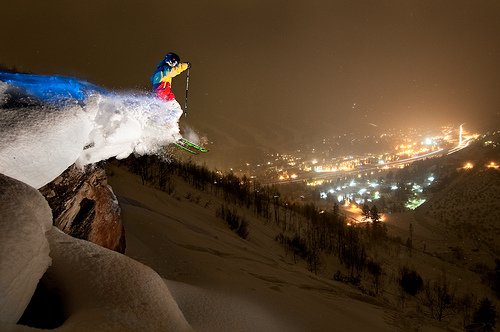
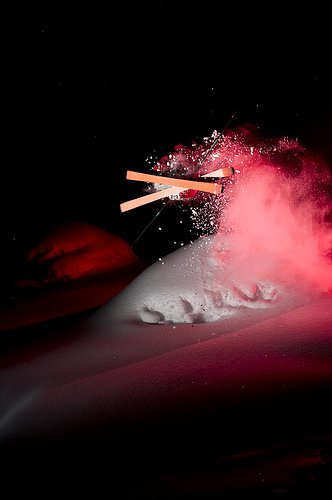
Skiing photography is plenty challenging in broad daylight. Take the daylight out of it and prepare for a whole slew of difficulties to create great shots. Here are 10 tips that will help you capture sick images!1. Get that flash off-camera! On-camera flash will make your shots look like Paris Hilton paparazzi photos, or snapshots that your parents took when you were a kid. Here's an article about how to get the flash off-camera: Basics of Off-Camera Flash2. Scout for a sick location before sunset that is accesible and within range of your car. The closer you are to civilization, the easier it is to setup and capture the shot.3. Bring a flashlight, or two. It will be incredibly difficult to focus without one. Aim it at the takeoff, or key point for the shot and pre-set your focus. Then lock it in by flipping to manual. Set the flashlight down aimed for the athlete to see, or have someone hold/aim the second flashlight for you.4. Bring a headlamp for the athlete to wear. It's helpful for them to actually see what they're doing….5. Pack as lightly as possible, but bring as many flashes as you can. Using more than one flash will create depth in your image and let you use backlighting.6. Setup the flashes and test them first. This way you can dial in the settings. Just have the athlete stand in a location and build up the flashes around them to get settings correct. From there, move the flashes to similar locations around the actual shot and fire as the athlete rolls through.7. Bring a 3rd person. Snow is tough to move around in, a 3rd person can be dedicated to holding a flashlight for focus, and moving/adjusting the flashes that are up near the athlete. If you can't find another person, show the athlete how to change power on your flashes so you don't have to hike up again and again.8. Bring snowshoes. This may not be necessary if the snow is shallow, but the best shots are when it's too deep to hike around. Snowshoes will enable you to move freely and not sink in past your chest….9. Compose to include trees, rocks, or city lights. These add depth and make the image more exciting and real. For city lights you will need to capture two images, a long exposure, and the flash shot, then blend them in post production. An awesome example of this was taken by professional skiing photographer Grant Gunderson, it's the first image on his website, here: http://www.grantgunderson.com10. Dress warmer than ever. It's bitter cold at night, and you are probably tired from a busy day of work. This adds up to one extremely cold experience. Stay warm and have a happy shoot!11. Yep, we are cranking the volume to 11 here! Have the athlete give you a countdown before the key shot. It will be very hard to see them as they pass through the frame, even with a flashlight. Click after they give you a 3-2-1…12. Did we say 10? Oops, we really meant 12… Bring some gels for your flashes to get creative with color. We use the LumiQuest FXtras. They come with 8 gels for each holder and stay on our flashes at all times for whenever we need them.


Comments